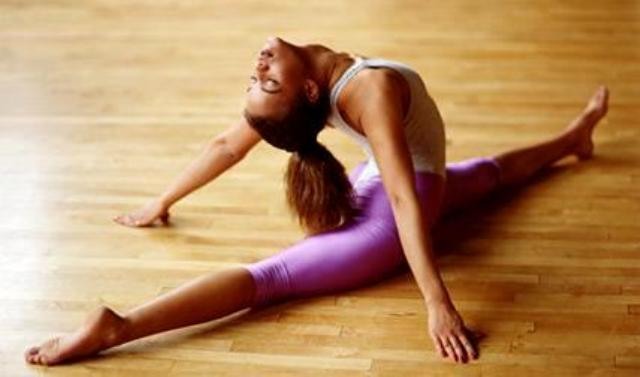
, cross twine It is not a natural posture for a person, therefore it requires even more patience and work. The fact is that without a good stretch, our hip joints will not allow you to separate your legs to the sides by more than 90-110 °, and this “degree” is not enough for transverse splits :) Definition: transverse splits - this is a body position in which the legs are directed to opposite sides of the body and form an angle close to 180 ° (i.e., the maximum possible angle).
Cross split: advantages
- Tightens the "capricious" inner surface of the thigh, strengthens the rectus abdominis muscle.
- It improves the blood supply to the pelvic and abdominal cavities, thereby preventing congestion and diseases of the urogenital system.
- Makes hip joints more mobile, improves the elasticity of the inguinal ligaments and muscles.
- Stimulates the work of the intestines and the digestive system as a whole.
- The twine skill is especially recommended for women. reproductive ageplanning children: the mobile pelvis makes it easier for childbirth.
- Besides, cross splits are incredibly awesome!
Cross split: disadvantages
- A complex element that requires considerable diligence, patience and a systematic approach.
- Without regular stretching skill twine is easily lost.
- Attempting to perform this element on “cold” muscles and ligaments can result in a serious injury.
Contraindications
Attempts to sit on the splits should refrain from people with spinal injuries (especially the lumbar and sacral parts), hip and knee joints.Exercises to sit on the transverse splits
Thanks to the exercises described below, (with proper zeal) you learn how to sit on a stringer no worse than Van Damme in his famous roller with Volvo trucks. Do exercises at least 4-5 times a week (ideally, every other day).It's all about consistency! And it is important, of course, not to overdo it during exercise, so as not to get injured. Do not forget to warm up.
So, here they are - the treasured exercises that will put you on the splits :)
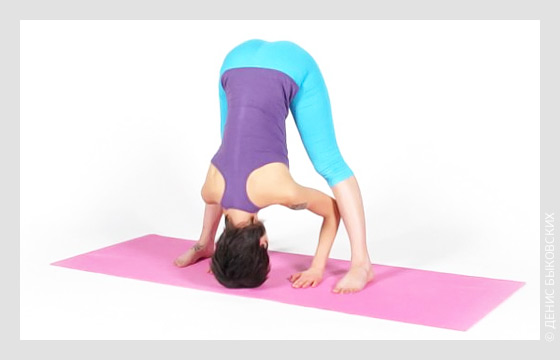
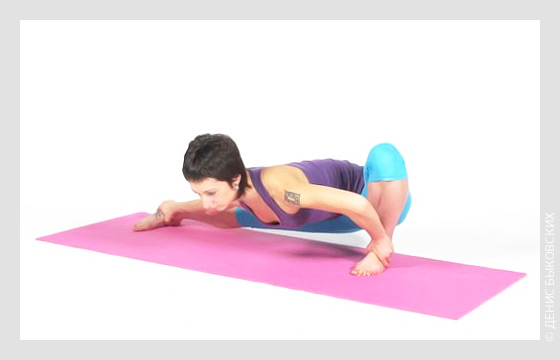
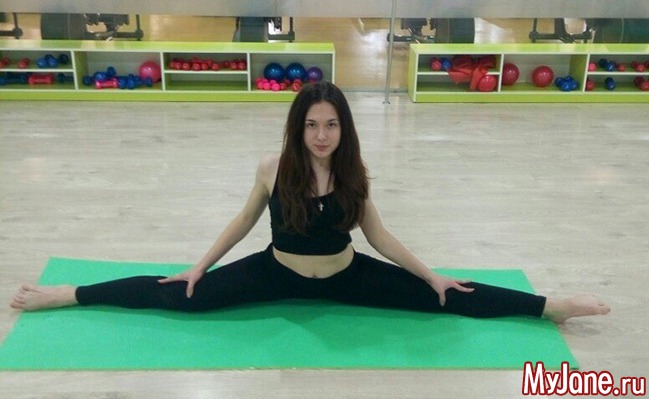
In the photo: Inna Vidgof, instructor of yoga for the project “Live!”
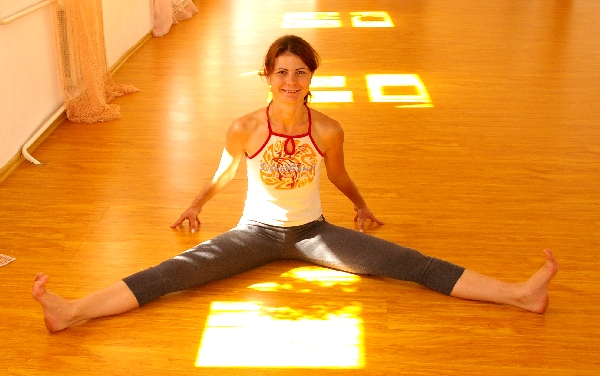
1. "Deflection"
| The full title of this exercise sounds like "deflection in a wide support while standing." With this pose, we begin a set of exercises to prepare the body for cross splits. Spread your legs wide (width should be about one meter). Foot set strictly parallel to each other. Place your palms slightly below the waist. While inhaling, without jerking, bend back, helping yourself with your hands. Try to reach up the upper part of the body, and the shoulders, on the contrary - direct down. Do not overdo it, you should stand firmly on your feet and not lose balance. If dizzy - exit the pose carefully. Fix the position for 30 seconds. Breathe exactly. |
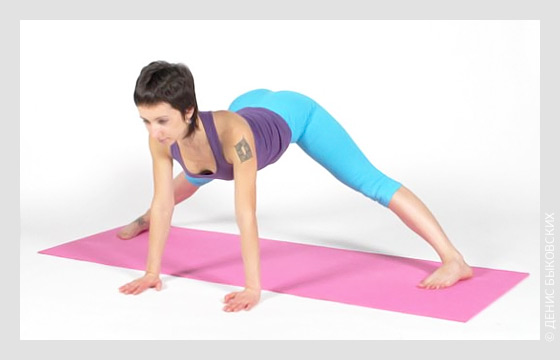
2. "Tilt"

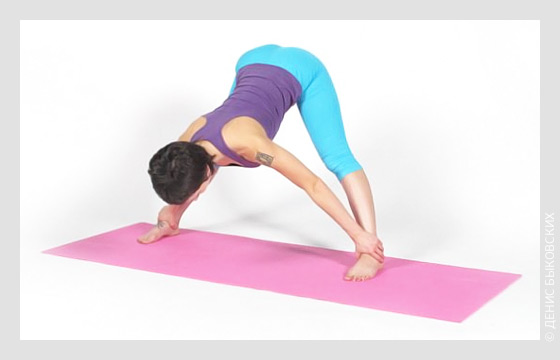
3. "Deep tilt"
4. "Squats"

5. "Stupa"
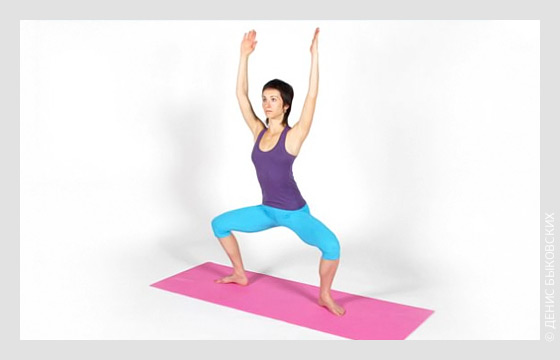
6. “Side attacks”


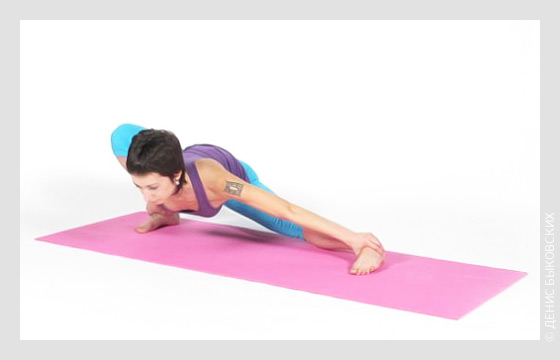
7. “Pushups”

8. "One step to the twine"

The ideal stretching and graceful flexibility is the dream of every girl who sometimes remains unfulfilled, simply because she lacked willpower and determination, or at some turning point she suddenly stopped believing in herself and her abilities of your body.
How to sit on the splits at home
Perhaps we will start with the good news: to develop such an opportunity you will not need anything other than a rug, patience and time. By the way, about time: as a rule, the less a person's age, the faster he manages to stretch his muscles, regardless of gender. But even in adulthood, it’s quite possible to sit on a splits in just a few months, if you don’t forget about regular training.
Any exercise, and even more stretching, should begin with a warm-up, otherwise you risk breaking muscles and your dream of an ideal stretch will have to be postponed for a while. To warm up it is enough to perform squats, jumps or just swing your legs and arms for 5-10 minutes. But ideally, of course, stretching - stretching exercises - is best to start after a full strength training, for example, after a good workout in the gym.
How to sit on the splits
Twine is not just a beautiful, graceful stretching, with which you can conquer your friends (for which, however, most girls do these exercises). In fact, thanks to the splits, you not only strengthen the muscles of the hips, back, abdomen and buttocks, but also get rid of a large amount.
In order to understand how to properly sit on the splits, you need to decide on the choice of the kind of stretching to which you aspire.
- The long twine. The simplest type of stretching, it is best to start with the longitudinal twine. You can vypolnyat both on the left and on the right side.
- Cross Twine.
- Bonded splits. It can be both transverse and longitudinal, but at the same time the inner part of the thigh forms an angle of more than 180 °. Can be performed in the air or when the legs are on the dais.
- Vertical twine. With this type of stretching, one leg is on the floor, and the second one is moving upwards, as close as possible to a level vertical position.

Twine exercises
As soon as possible to sit on the splits you can use our exercises, described below. Of course, on the condition that you will perform them daily several times a day for well-warmed muscles. By the way, to warm them even stronger, before training you can take it, where you need to massage the buttocks and the inner side of the thighs well with a stiff brush.
When the warm-up is done, you can go directly to the exercises. They should be performed under relaxing pleasant music, slowly listening to every cell of your body. As you warm up, you yourself will understand when you can proceed to the next exercise.

- Sit on the floor, stretching your legs and straightening your knees as much as possible. Hands try to clasp your feet, leaning behind them as low as possible.
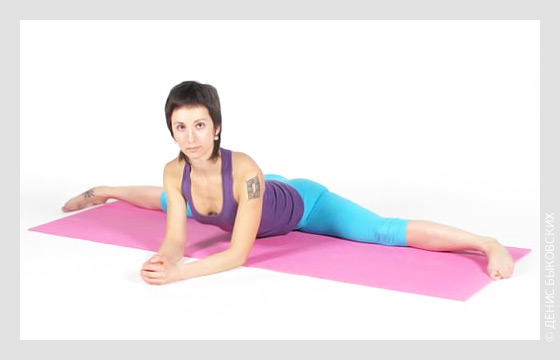
- Leave one leg straight in front of you, and take the other side as far as possible, forming a right angle of 90 °. The back and legs should be as straight as possible.
- Lie on your back, lift your elongated legs, forming a right angle. Spread them as far as possible, helping your hands to touch the floor. Of course, for a beginner it is almost impossible to do this, but we are striving for the perfect stretch? Connect your legs, rest for a few seconds and repeat the exercise again and again.
- Perform alternate swinging with your feet to the side, first lying on your side, and then standing with your back straight. Hold each leg in the air at maximum height for a few seconds.
- Make smooth attacks, trying to touch the floor with the back of the thigh, pulling the leg out as much as possible. Hold this position.

How to sit on the splits for the month
A month is a very short time in order to achieve the perfect twine, even if it is longitudinal. But still, when performing exercises as often as possible, without missing a single day and warming up your muscles well every time, your dream will come true in a month. It is quite possible if you are patient!
This video shows a very useful exercises, which you can also combine with those described above in order to speed up obtaining the desired result.
How to sit on the transverse splits
For cross twine you will need much more perseverance and time than for longitudinal. But, you see, it is worth it!

There are 3 main exercises that can help you sit on the cross splits, while combining them with the rest of regular stretching exercises and strength training to strengthen the muscles.
- Sit on the floor, perfectly straightening your back and legs apart as wide as possible. Raise your arms and tilt your torso to the floor, trying to lie flat on the floor between your legs. Touch the floor not only with your head, but with your chest and belly. Then perform the same exercise with turning alternately to the left, then to the right leg. Over time, this will get you better and better! By the way, for convenience, you can perform this exercise by hooking one leg, for example, behind a doorway or a leg of a bed.
- Stand straight, spread your legs as wide as possible. Hug yourself in your arms and make slow bends, trying to touch the floor with your elbows and forearms, while keeping your legs as straight as possible. When you succeed, you can relax, leaning with all your weight on your hands.
- Stand with your legs straight and shoulder-width apart. Do slope, palms up on the floor. Relying on the hands, gently spread your legs until you reach the maximum width. Hold this position for a few minutes.
In order to sit on sagging twine, you need to have not only good stretching, but also strong legs. In addition, coordination and the ability to tune in to perform complex exercises is useful. It seems from the outside that everything is so simple - I sat down on the string between two chairs and you smile. In fact, the muscles are subjected to serious loads, which need to be well prepared.
Step one - learn to sit on the cross splits
The first thing you need to learn to sit on the transverse splits. There are many techniques for this. The most important thing is to breathe in the larynx, which allows the muscles to relax and quickly saturate them with oxygen.
Before you sit down on the splits themselves, you should warm up a little, conduct a few preparatory exercises aimed at stretching the muscles that will be involved in the transverse splits.
Step Two - Improve Stretching
So you can sit on the transverse splits. Now we need to improve the stretching in order to achieve sagging between two parallel supports. To do this, during stretching exercises, we place the surface under each leg (or under one leg) of the surface, which will allow us to increase the amplitude of stretching.
First, it is necessary to enclose the surface low, gradually increasing the height by a centimeter. As a result, you need to ensure that you sit on the transverse splits, putting his feet on the surface, standing at least 5 cm above the floor. The higher the surface, the better.
Step three - make your legs stronger
In order to sit on sagging twine, without causing damage to the body, you need to have strong legs. To do this, you will often have to squat, do jumps, run 2-3 kilometers, do the exercise “bicycle” (lying on your back, rotate your legs, imitating cycling).
Good exercise - rolling from foot to foot in a semi-split. This is how the inner surface of the thigh, buttocks is trained. It is important that all exercises are dynamic. Complete each strength training with stretching exercises so that the muscles do not get blocked.
Exercises with a pear, on which it is necessary to strike with kicks, are very well suited. But this lesson is available to those who own at least a little blow technique. During a kick, the legs rise to different heights, the level of lift gradually increases. Particularly effective is kicking on a punching bag after training to increase strength in the legs.
Sit on sagging twine
Before you sit on sagging twine, you need to spend a long warm-up. Only after you calmly sit on the cross splits, warm up all the muscles, you can begin to complicate the exercise.
At first, you need to rely on something with your hands. In this case, the feet are placed on the surface in such a way that the socks are looking up, and the main emphasis when sagging is on the inguinal and gluteal muscles. In no case do not transfer the main load on the knees, as they may be injured.
After trial exercises with the support of the arms on the crossbar or chair, you can try to sit, removing your hands from the support. Watch your breath. It should be through the larynx and smooth. Muscles while not tense.
Cross twine - the most difficult type of stretching. For many people, he becomes an unattainable dream because of his physique or lack of perseverance. In some sports, splits are an essential element of the program - in sports aerobics, rhythmic gymnastics, etc.
Instruction
Before starting on flexibility, you need to warm up your muscles well. Include in the warm-up exercises for rotation in the hip and ankle joints, flexion and extension of the legs at the knees. Are effective for warming up occupations on a racetrack and on the exercise bike. Try to train in a warm room. Wear elastic pants and a trowel that completely covers the body. So you will avoid cooling the muscles during stretching.
Train at least three times a week for 30 minutes. If you want to sit on the transverse splits quickly - do at least five times a week. The first time, when muscles begin to hurt after stretching, it is better to train in 1-2 days until the pain passes. After the adaptation of the muscles to the load, you can proceed to daily exercises.
Combine stretching with moderate strength training. During power loads, muscles consistently contract and relax, and intermuscular coordination develops. Do forward with dumbbells in hands, squats with light weight, swing legs forward and to the sides with weights. Pump the muscles of the calf, thighs and buttocks on simulators. Stretching is more effective to do after strength training.
While doing stretching exercises, try to relax your muscles as much as possible. Tense muscle you can not stretch. Do tensile force for 10-15 seconds while exhaling, while inhaling - return to the starting position. Keep your back straight. If severe pain occurs - loosen the ligament tension. Pull to smoothly, without sudden jerks.
Include three basic exercises in stretching to help you sit on the cross splits:
- Sit on the floor, spreading your legs apart as much as possible. Raise your hands up, straighten your back and make five smooth bends forward with a return to the I. p. Then put your hands down and drag them as far as possible from you for 10-20 seconds. Take a short break and repeat 3-5 times. Try to reach for the floor not only with your hands, but also with your chest and belly. Ideally, you should completely lay your torso on the floor. Reach for the right and left leg.
- I.p. - standing, legs wider than shoulders. Clasp your elbows with your hands and reach down with your forearms. When you reach the floor, reduce the distance between your legs and repeat the exercise.
- I.p. - standing, legs wider than shoulders, palms resting on the floor, fingers looking forward, back straight, chin raised. Gradually spread your legs apart, trying to reduce the distance to the floor. Feel unbearable pain - sit, relax. Do 3-5 times. This exercise is best done on a slippery surface - linoleum, parquet.
Related videos
Sources:
- how to twine the guy
Almost anyone can sit on the splits, regardless of their gender and age. To get on the splits quickly, you need to diligently engage in doing not only stretching exercises, but also doing warm-up in order not to pull the muscles and ligaments.
Many people want to get on the splits quickly, but there is still no need to put any temporary restrictions in this process. To achieve the desired goal, people with different training can at different times. In most cases, to get a result, not only desire, but also time, patience, hard work is necessary.
If during the exercise you feel a slight pulling pain, then you should not worry. However, with the appearance of sharp pain in the muscles, you should immediately stop training.
Do classes every day, doing the exercises slowly and smoothly. The duration of training should not be less than half an hour.
Always start your workout with a warm-up to warm up your muscles. If possible, take a run. At home you can replace it with squats or jumping rope. It’s good to take a hot bath for ten minutes before stretching, thanks to high temperatures muscles will be easier to stretch. Also, warm-up well-waved straight legs.
During the warm-up it is also necessary to prepare the joints and ligaments. To warm up the hip joint, make a rotation with the leg bent at the knee in both directions. Rotational movements of the ankle and tibia and turns of the body are also an essential part of the warm-up.
After warming up exercises, you can go to the complex, which will help you quickly sit on the splits. It is advisable to perform the exercises in the sequence in which they are located below.
1. Bend one leg at the knee and push it forward, back off the vtor and straighten. With a straight back, do 30 springy squats on each leg. With each lesson, try to spread your legs further.
2. Spread your legs wide. Sit on one, keep your friend straight. Do smooth rifts 30 times, trying to fall as low as possible to the floor.
3. Sit on the floor, move your feet, spread your knees apart. Press your feet with your hands, performing springy movements 30 times. Try to get your knees to the floor.
4. In the pose of the previous exercise, lean forward, clasping your feet with your hands, try to hold on for a few seconds in this position, and then straighten yourself. Repeat 3 times.
5. Sitting on the floor, straighten your legs, pull your socks toward you, clasp your feet and stretch your chest to your knees without bending your legs. Try to linger in the lowest position for a few seconds until nagging pain appears. Make 3 sets.
6. Arrange your legs wide apart, with your hands flat on the floor. Lower the pelvis, bending your back. Do 30 repetitions.
7. Sit on the splits as low as possible and squeeze your legs, as if trying to get up. Strain them for a few seconds, then relax. Take a few approaches.
8. Sit on the splits, slightly spring, stay in the lower position for a few minutes. Tilt to both feet. Make 3 sets.
Related videos
Sources:
- how do i learn to do splits
I would like to tell you a little about the cross splits and the “wide angle” - in training I am often asked “how to get on the splits quickly?”. There is no quick way, it may take years to achieve a result, but I myself once started and I succeeded. Maybe here this information will seem useful to someone.
What is important to know:
In this unnatural and uncontrollable from the first time, a normal person stretches a lot of muscles and tendons, but the “cherished key” is hidden in the hip joints. Until they unfold properly, it will be impossible to sit on the splits. How to open them?
A lot of time needs to be given to warming up - in the second half of the lesson, towards the end, they go to Samakonasan. Various attacks can be considered as failing exercises, Virbhadrasana and others like them :) If you are not engaged in yoga, but are strongly interested in splits, any quality heating of the body and legs will do.
The main secret is breathing. I will write about my experience, about what helped me personally and, I hope, will help you too.
We take a breath - concentrated good breath, visualize how the air fills the hip joints and hips, straightens them from the inside, relieves all clamps and tension. We pause. Maintain concentration in areas that are straining. The exhalation - through the nose, with a slight effort, overlaps the glottis - so that you can hear the hate, in yogic terminology, this is called ujaya. Tightening the pelvic floor and lower abdomen - we retract the stomach under the ribs at the end of the exhalation. With attention, we pull tension from the hip joints into the center of the abdomen.
Breath: on 4 counts - inhale, 2 counts pause and 4 counts (or longer) exhale.
Wide angle for beginners
So, there is a “wide angle” and there is a cross split. These are different things.
We sit down, spreading his legs as wide as possible and gently dropping his chest to the floor. The main condition is a straight back.
To ensure the evenness of the back - we hold our hands behind and move forward as far as it turns out. If the maximum, which is obtained with a flat back does not cause optimism:
So you can sit on a cube, on a plaid folded in several layers or a small pillow:

It will be easier for the pelvis to roll forward (so that the stomach “looks” on the floor) and the process will be more fun:

If nothing like this is not there, it does not matter - you can bend your knees.

What should definitely not be done:
1. Stretch forward with a rounded back. The goal is not to lower your elbows on the floor, but to open your hips. 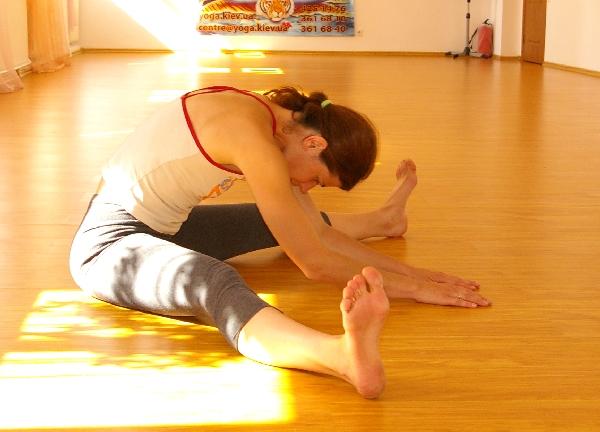
2. Pull the top down and hunch. Socks should be stretched over themselves. 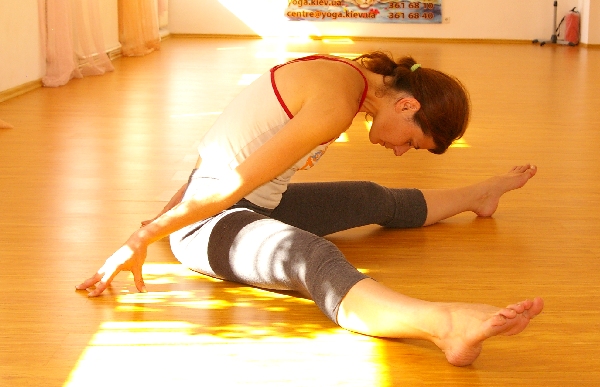
Wide angle - advanced level
So, if you do not have problems with all of the above, move on.

Only when the body with a flat back leaned low enough, you can put your elbows in front of you: 
Then go further forward: 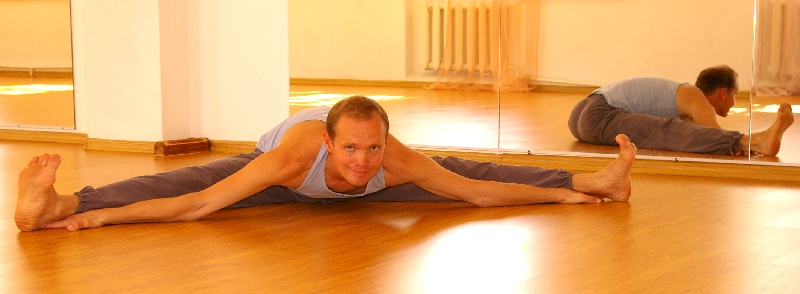
And finally, lower the belly to the floor:

When in this position you feel good and comfortable, you can reach out of the pelvis, helping yourself with your hands. At this moment, the loin feels very good - the muscles relax, tension is removed from the lower part of the spine.

Cross Twine
There are many textbooks on the development of cross splits and they are all approximately the same and effective. From myself I would add that without mastering the “wide angle” I could not master the transverse splits.
For beginners, you will need cubes or stacks of books on which to lean. It is recommended to stand in this position (if you are unbearable to get the desired “twine”) for at least 3-4 minutes, that is, fewer approaches and more time for actual stretching. The body of an unprepared adult resists with all his might, and for at least a few minutes it is necessary that the legs experiencing the stress of an unnatural position relax and you sank a little lower:
With regular workouts, we gradually sink lower and lower. It is important to listen to the sensations - this is an incredibly traumatic exercise, which is fraught with sprains and knee problems. It is better not to sink as low as it seems to you that you can - but stay longer in a tolerantly comfortable position.
you need to try to lower the belly on the floor

Then you can straighten up:
What is the difference
So, the splits are of two main types - longitudinal and transverse. In both cases, the legs will have to be diluted to the unfolded angle, i.e. they must form one straight line. In the case of longitudinal twine, one straight leg is placed in front, and the second behind.In the case of transverse twine, straight legs are arranged across the body, i.e. divorced to the side.
Longitudinal splits are considered to be easier to perform. It happens, the longitudinal splits are obtained without difficulty, and the transverse splits do not submit in any way. It happens that in the longitudinal splits easier to go with a certain leg. Say, when the right leg is in front, you sit down without difficulty, but when, on the contrary, certain difficulties arise. Such distortions must be removed and stretched in all directions symmetrically.
But, since you are reading this article, it’s too early to talk about eliminating imbalances. Let's talk about what needs to be done to get into the splits, and whether it is given to all.
Given to all
Anyone can sit in the splits, if he really wants this. It does not depend on age, nor on body, nor on the level of physical fitness. Another question is how long preparation will take. It happens that a person is flexible by nature and with a certain effort over himself, he goes into the splits for several months. It happens that the years occupation does not bring the desired results. Then it is necessary to reconsider the motivation, the very essence of the goal set before itself, perhaps, the training scheme, the regime, etc. In any case, if you have conceived to sit on the splits, to be reserved with perseverance and patience.What will help
1. Regular training at least 15 minutes a day (preferably half an hour).2. High-quality workout. 10-15 minutes you need to devote a good, how to warm up. Take a walk, go for a run, follow the slopes of the body, swing your arms and legs. All this will help prevent injuries during the main stretch.
3. A trainer or other assistant (friend, family member, workout colleague) who can follow your posture while doing exercises, symmetrical shoulders, will put pressure on certain parts of your body to increase the range of your stretch. Such assistance can accelerate your entry into the splits almost doubled!
4. Warm room. The ambient temperature directly affects the quality of the stretch. The warmer the room, the less danger of injury.
5. Slippery floor. Often we are so afraid of causing ourselves discomfort during stretching, that we spare ourselves too much and do not use our full potential; we avoid a sharp increase in the amplitude of the elements performed. Slippery floor can help become bolder in this matter. The best slip on the floor can provide socks. Catching barefoot is more difficult to slide.
6. Bath. If you overdo it, and after a workout you have all the pain, go to the steam room, it will perfectly remove the fit. Especially this advice would be useful if you are new to stretching.
Common mistakes
1. We are springing. Often, taking a certain position in stretching, we begin to spring in it, hoping to achieve a higher amplitude of movement. This is not necessary. The essence of proper stretching is to take a position and relax in it. Only by completely relaxing, we ourselves can feel how the muscle stretches and pushes us to a painless increase in amplitude.2. We stretch, overcoming pain. We are not in ballet, not in rhythmic gymnastics, not in circus, not professional dancers or wrestlers. In the above cases, the splits need to get out quickly. This is a professional necessity. We rush to nothing. Our guide, that the process is moving in the right direction, is a slight feeling of discomfort from class to class.