Application from colored paper "Kitty". Templates Master class with photos
Master class: Application from colored paper "Kitty"
Nechaeva Elena Nikolaevna, teacher primary school KSU "Secondary school No. 21 of the village of Saryozek" Osakarovsky district Karaganda region KazakhstanHandicrafts made from colored paper is a very interesting activity. Beginning with kindergartenwe teach children how to work with paper, learn how to cut out the details according to a template or provide an opportunity to dream. A master class in needlework is designed to work with children 7 - 8 years old and for those who like to work with colored paper. The material can be used in labor classes or circle work. Everyone loves cats very much and this work can be like a pet's favorite pet.
Purpose: development of the ability to perform interesting work from colored paper.
Tasks : teach how to choose the right color for the application paper; correctly, carefully cut the parts, observe safety precautions while using scissors in work; develop imagination, imagination, creativity; nurture respect for animals.
Materials and tools required for the manufacture of applications: cardboard, colored paper, scissors, glue, pencil, black marker or marker, templates, sample work.
Performance of the "Kitty" application.
Guys, many of you have a cat at home. I want to offer you to make a kitty out of colored paper. Sample showing.
Guys, we will need to work with scissors, let's remember how to handle scissors during work.
Safety when working with scissors:
Use scissors with rounded ends.
Keep scissors in a certain place, put them close with sharp ends from themselves.
Transfer the scissors you need rings forward with closed blades.
You can not cut on the go.
When working with scissors it is necessary to monitor the movement and position of the blades during operation.
Do not use blunt scissors or loose hinges.
Do not hold the scissors blade up.
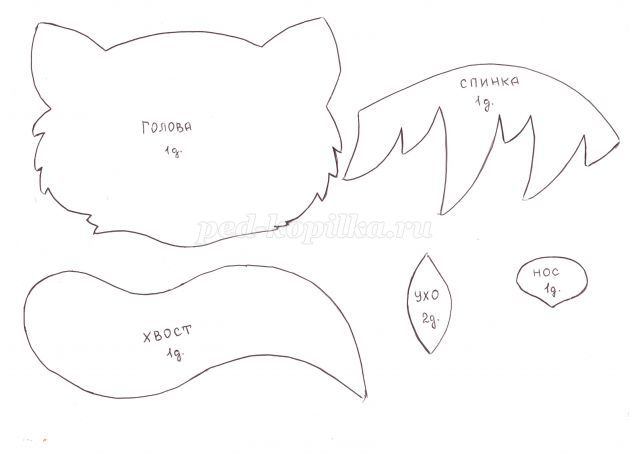
You have templates on the tables, with the help of them we will cut out all the details of our kitty.
Pick up colored paper for your cat. They may be different in coloring.
Circle the patterns and cut out the details.
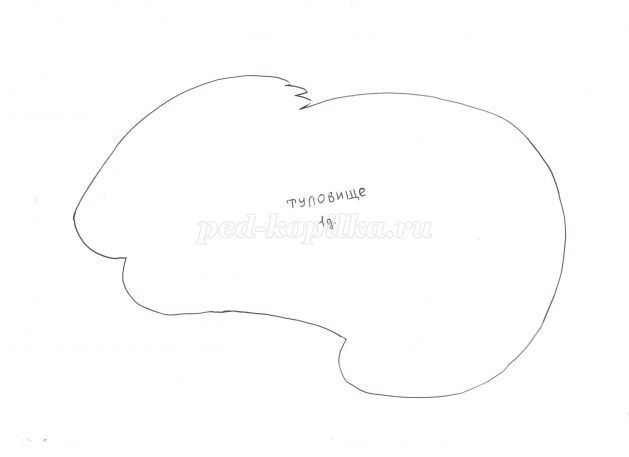
We need a head, torso, tail., Back, two ears, nose.
Cut out the body and stick it on the cardboard.

Stick head.

Glue the back.

Stick tail.
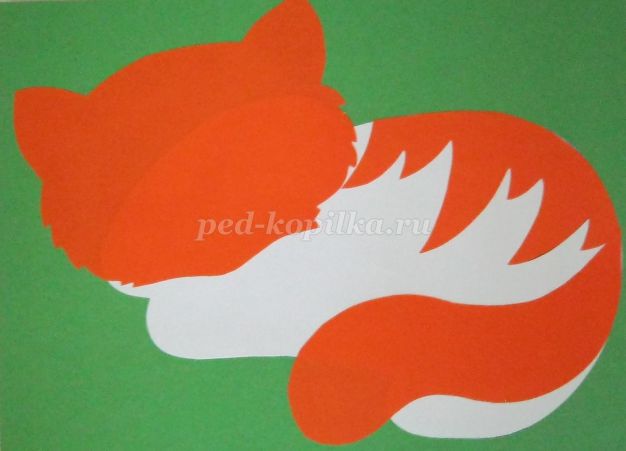
Stick two ears.

Stick a spout.
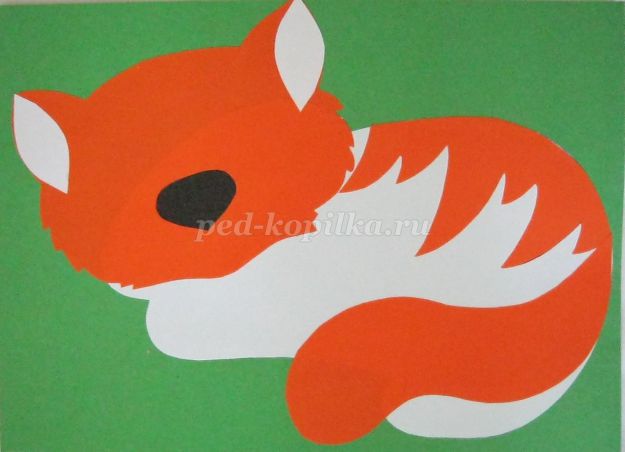
Draw a face marker. Our cat is sleeping.
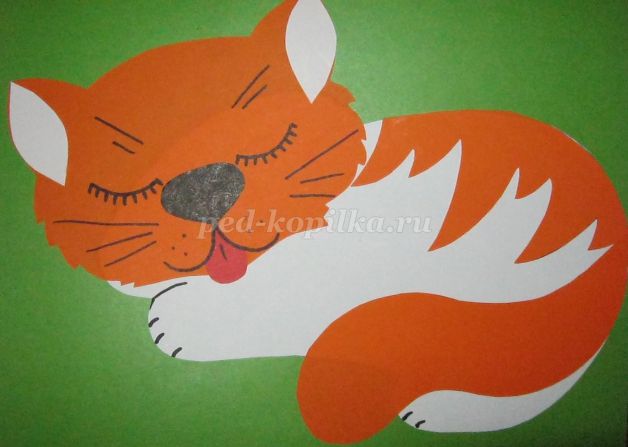
Here is a cat we have turned out.
You can make a cat with open eyes.
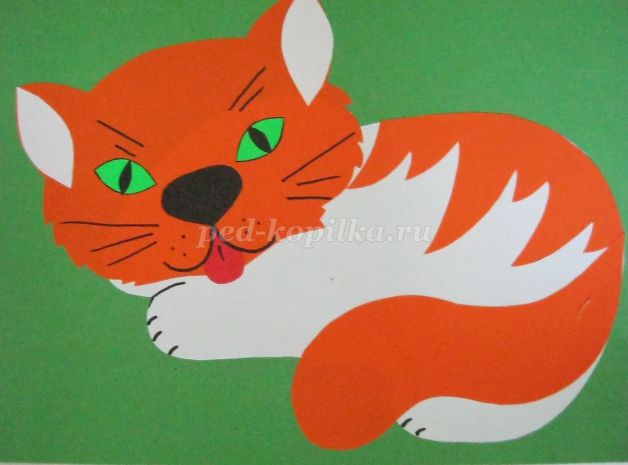
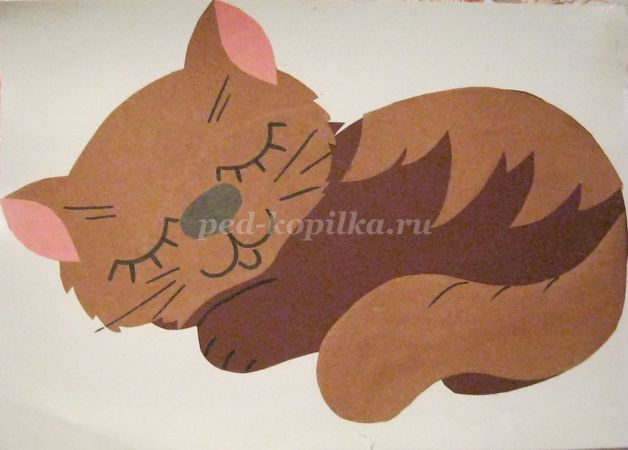
Cats can be made in different colors, at the request of the children.
It turns out that the “cat” application can be used extremely diversely. And not only kids can do their work in this technique. If you use a creative approach, the application "cat" will help to decorate life around and bring new colors to it.
Classes with children
Of course, this is the first thought, where a “cat” application can be applied. Especially since the kids really like these cute pets. And their life experience allows us to imagine how these animals look in reality.
But on the classes on the application with children should prepare a template of a cat. It is possible to cut out details from colored paper in advance - this is if the children are very small, 2-3 years old. And the older children can already just give a ready-made template of a cat made of cardboard, so that they themselves can circle and cut it out.
You need to glue the parts in turn. And the eyes and nose are already attached to the cat's head. Younger students are encouraged to offer only a body template, and let all the small details let them model and cut out on their own.
Scrapbooking card
Almost everyone is moved by the sight of a charming little cat. Therefore, postcards with kittens and kittens are in such demand. To make such a pretty picture, on which you can then issue a greeting inscription, is a snap.
If you plan to make a vintage card in the style of scrapbooking, then to achieve the goal is quite suitable application "cat" of paper and a few leaves, flowers. You can additionally use bows of satin ribbons or "grandmother's" lace, miniature rosettes of fabric and beads. It already depends on the flight of fancy. But the cat itself is better to make more natural. As the main application you can use a real photo taken by yourself or taken from the Internet.
Funny cards with cats
But you can create a creative greeting, almost without bothering to search for the desired image or template. This card is also an application. The cat is made in a primitive technique. Having carefully considered the sample, each can easily draw the same. Although a creative person still tries to create his own version in such a technique.

The cat itself can be cut from pieces of wallpaper. Small picture only emphasizes the originality of the idea.
Wallpaper appliqué
This is a new way to design walls. Particularly nice look on the wallpaper cats in children's bedrooms and games. Although some adults are not averse to decorating the walls in their bedrooms.
Cats can be cut from the wallpaper of other bright colors or from promotional materials, magazines. It turns out very creatively if the master manages to combine several colors in one application. And it will turn out just great if the cats on the walls are completely different.

As templates, those that are offered for making appliques on fabric and pictures from children's albums for coloring are suitable.
Cat appliqué fabric
Many needlewomen love to decorate clothes for kids. Such an application will make the outfit unusual, will give the child a uniqueness. You can sew a kitty on a shirt or dress, on a pocket or even on a jacket, hat.

Applications are sewn both on the product itself and on the fabric of a different color, which is then already on the thing. Some make appliqués using hot sizing.
To do this, the master first imposes a fabric with a circled side on the wrong side of pure polyethylene. Down enclose the newspaper. Then this “sandwich” is ironed with a heated iron over the fabric so that the layer of polyethylene and the fabric slightly “grab”. You need to be careful: if the iron is too hot, then the paper will stick to the polyethylene. And this should be avoided.
Then, a part is cut out of fabric with adhered polyethylene. Now comes the second crucial moment. The part is applied to the permanent location, polyethylene down, and carefully smoothed down with a hot iron. Now you need to try to appliqué tightly adhered to the base.
Applications with cats in the interior
Self-made things for home use are very much appreciated today. And with the help of applications, you can simply transform the design of the room. For example, sofa cushions with funny pussies sewn on them look amazing, give the house coziness.
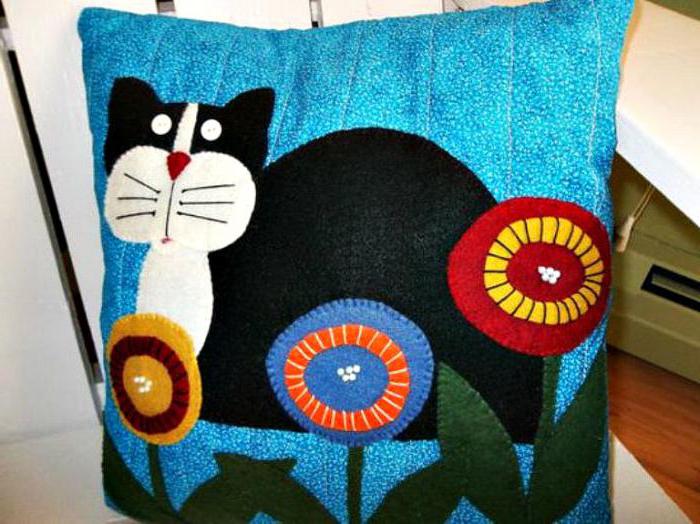
You can also make rugs on the walls or on the floor, napkins and tablecloths, decorate curtains in the kitchen and in the nursery with applications.
Many people are interested in patchwork today. Creating a patchwork bedspread, you can sew the appliqués of cats on every detail. Although it would be nice to look like a little thing, in which bright rectangles will alternate with calm monophonic in a checkerboard pattern.
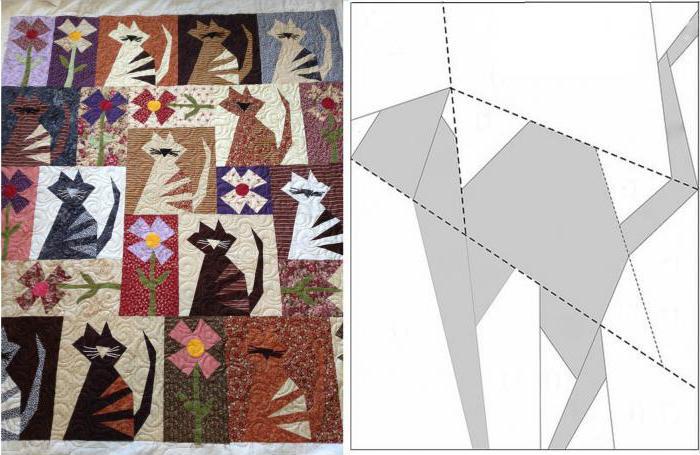
For such applications, primitive stylized cats are quite suitable. Even those who absolutely cannot draw can draw them with the help of a ruler.
Here is how much interesting things can be done using the application technique.
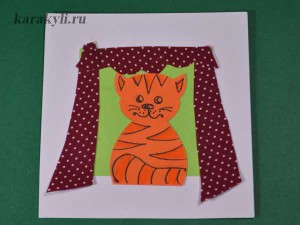
Paper application "Cat on the window" is designed for children from 6 to 8 years. That is, it will be interesting to the guys in preparatory group kindergarten or in grade 1-2 school. By combining the blocks made by the guys into a common “home”, you can get an excellent collective work “Cat House”. But it would be nice to look and solitary work. In the process of making an appliqué, children will be able to practice symmetrical cutting, cutting out simple geometric shapes. If you are doing the application "Cat on the window" with schoolchildren, then this is a great way to consolidate the skill of using the ruler to measure and draw lines. With all its simplicity and “zadannosti” this application leaves the children room for independent creativity.
For the manufacture of applications from the paper "Cat on the window" with the children, we need:
Colored paper
Colored cardboard or sheet of Whatman paper
Glue
Scissors
Ruler and pencil
Markers
Trimming fabrics, candy wrappers, wrapping paper - if we decide to make curtains of them.
Stages of the creation of applications from the paper "Cat on the window"
We give the minimum sizes of elements - it will be difficult for children to work with smaller details. You can proportionally increase all the details.
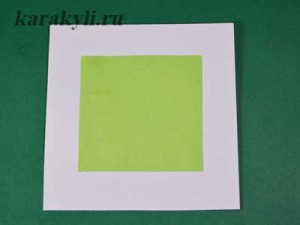
Step 1
Let's cut out square paper with the size of 10x10 cm from Whatman paper or colored cardboard, and smaller square 6x6cm from colored paper. For preschoolers, you cut these shapes yourself beforehand. You can chop multicolored squares and offer children to choose “windows” of the color that they like.
Schoolchildren can themselves measure, draw, and then cut out these figures using a ruler and pencil. Paste a small square on a large, located in the center. The place of gluing the square is determined "by eye".
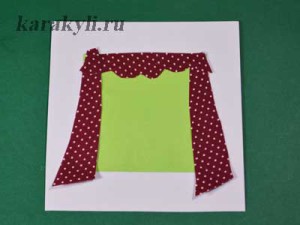
Step 2
Cut out of paper, cloth, curtain wrappers. They can be rectangular, triangular, trapezoidal - any. Cut out their children without the help of a ruler and a pencil, "as it will". It is better to glue the curtains only at the top, so that they can “flutter” freely. If curtains are made of monochromatic colored paper, children can decorate them with any patterns using felt-tip pens.
Step 3
So we made a window. Now on our application there is not enough cats. For a cat figurine, you need to take a rectangle of paper of a suitable color size. 4x5 cm. For preschoolers, an adult prepares such rectangles in advance, and schoolchildren cut them out themselves.
Rectangle fold in half, face inward. Draw a pencil "half cat". We do this without a template. If the children are at a loss, show them that the figure consists of two semicircles, like a snow woman. And then you can finish the eyelet. Figure unfold and draw the details.

The tail of our cat can be drawn, and you can cut extra.
Glue the cat to the application window. The block of our "Cat's house is ready."
Step 4
If we do collective work, then we glue together the block-windows with scotch tape on the wrong side. For the beauty of the "seams" in our house can be glued with strips of paper. From above to the house we glue the roof. Now the application is ready.
This is how a collective “Cats on the window” paper may look like. Of course, the number of floors can be significantly increased!
And if you do not plan to make more than one block, then it can be completed with a flat or triangular roof.
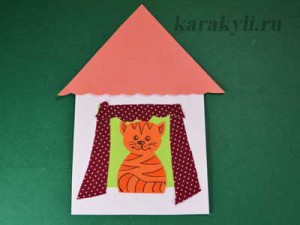
A single block of application "The cat on the window," which became a small house.
Applications will allow a small lover of the cat family to thoroughly explore the animal world, creating a craft with their own hands. It is very interesting to take as a basis for creating crafts not only a real cat, but also a cartoon character. Such children's form will help to attract the child, who for the first time sits down to create such a difficult occupation as making an application.
The master class will introduce preschoolers and their parents to the fascinating world of wildlife, show various techniques, and also help to better understand how to create real masterpieces from scrap materials. Will show in stages how to create crafts.
Application "cat on the window"
In order to make the window sill, use a few thin strips of colored paper, superimposed on each other. The cat is ready. It can be framed, and to decorate it stick on it footprints or draw them.
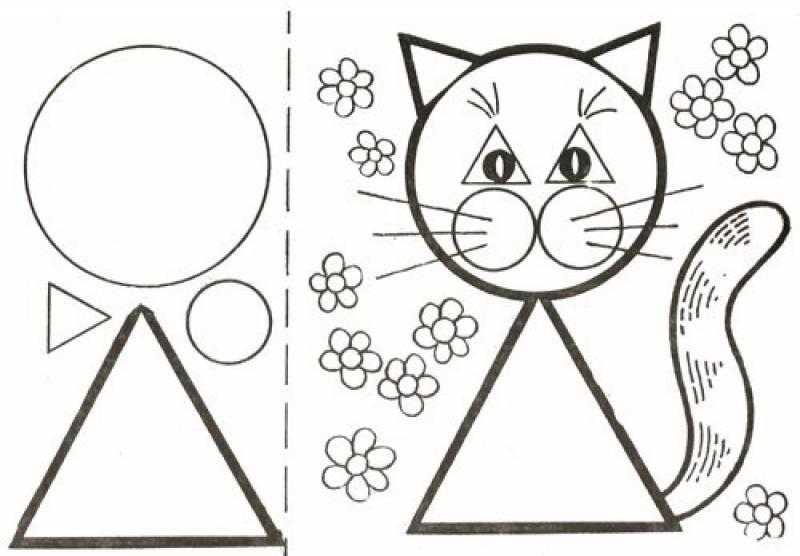
Applique cats from geometric shapes
The most common type of application in the younger groups of kindergarten is paper craft. It is created on the basis of simple geometric shapes: circle, square, triangle. They are easy to cut, even for small children. Such simple crafts will be the perfect option for very young children in younger group kindergarten.
Consumables:
- White cardboard.
- Black paper or color.
- Glue.
- Scissors.
Step-by-step instruction: using templates of geometric shapes, cut out the necessary elements along the contour, as in the figure:
Younger children, who still can not use scissors, cut the figures and let them place them in the correct order on the stencil.
 If desired, the application can be framed and hung on the wall. White background can be painted with felt-tip pens or pencils at the discretion of the child.
There are many examples for the “Cat” application that can be made using geometric shapes.

You will have a wonderful and simple cat that will appeal to all children.
Application for kids "Cat"
To create a simple cat does not need a lot of materials. It is ideal for older children creating applications in the younger and middle groups of kindergarten. Consumables:
- Templates
- Brushes.
- Scissors.
- Glue.
Step-by-step instruction. First you need to make the cat patterns out of colored paper. So that children do not have to cut them, you can do it yourself in advance. Do it like in the photo:
cat house
The application on the theme of the famous work of Marshak “The Cat's House” will not only please the children, but also introduce them closer to the work of the famous author.
Consumables:
- Glue.
- Scissors.
- Napkins.
- Colored cardboard.
- Harvested pattern of a burning house from a fairy tale.
Before proceeding with the “Cat House” application, prepare a template. To do this, you can use the usual coloring on this topic. Children will love to decorate themselves with felt-tip pens or paints a drawing, and then cut and paste it:
Cut out the template after painting it and glue it on paper:
You should have such wonderful houses on a colored background, which can be framed and hung on the wall:
Appliqué "Puss in Boots"
Puss in Boots is a famous artistic character from literature and many cartoons. To create it from a fabric does not require a lot of materials. However, it would be best to create older children. Consumables:
- Styrofoam.
- Marker.
- The cloth.
- Nail file and scissors.
- Stationery knife.
Step by step instructions: you must take a piece of foam 80 x 50 and a thickness of not more than three centimeters. The foam should be cut gently with a knife, then apply a cat pattern on it, as shown in the photo, on the stencil:
Extend the knife no more than 1-1.5 cm. And carefully cut the pattern along the line:
Well, now take the fabric of the color you like and cut out the gloss. It should be slightly larger than the part to fill it. Use a nail to adjust the fabric in the slot:
The remaining fabric is tucked into the slits, while looking to the edges were not curves. You can also use glue for this, squeeze it out a little bit. This is what should happen in the end:
Thus, fill in all the remaining sections of our picture, as shown in the photo:
Application from color felt "Kitten Gav"
Creating an application based on the character of any cartoon is especially fascinating. To create a famous cartoon character kitten woof will need perseverance and effort. This craft is perfect for kids from senior group and preschoolers. Consumables:
- Pencil.
- Color felt.
- Brush
- Glue.
- Scissors.
- Sintepon.
- Colored velvet paper.
- A skewer made of wood.
Cut out the patterns as shown:
Circle all the stencil details in order to cut them out of felt. After that, cut out the details as in the photo.