A gift made by hand, the most valuable. Postcards and crafts for March 8 are always nice to give your mother, grandmother, girlfriend, girlfriend.
The fact that you invented something and did it yourself shows how warm you are to a person, appreciate and love him.
On our site you will also find:
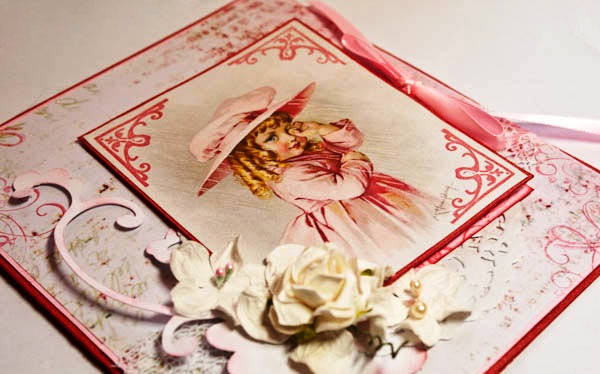
Postcards from March 8. Mini-secret.
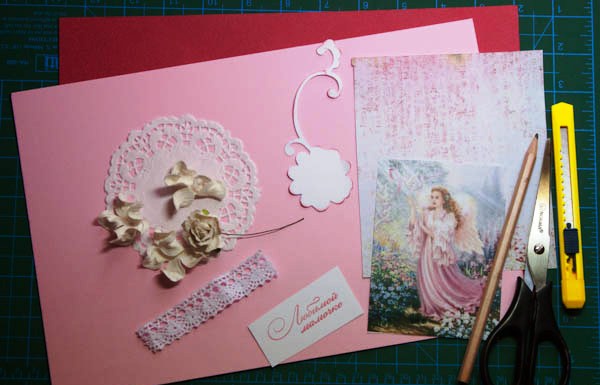
You will need:
Scissors
Stationery knife
Pencil
Colored cardboard (red and pink flowers)
Scrap paper
Beautiful image (in this example, this is a photo of a girl). You can use personal photos.
Openwork napkin
Lace, flowers, openwork napkin, paper curl (can be replaced with feathers) and other decorations
All the preparation can be divided into 2 stages: the creation of a mother's card and a daughter's card, i.e. the main big postcard to which a smaller secret card will be attached.
Stage I
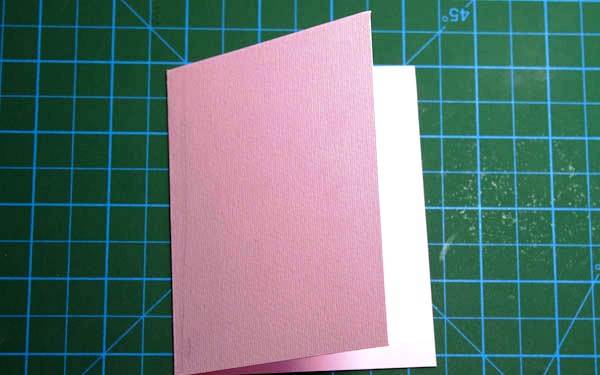
1. Prepare thick red paper or cardboard and cut out a blank for your postcard. In this example, the size of the workpiece 15h16sm.
2. Prepare a pink cardboard and cut a rectangle out of it, which will be only a few millimeters smaller than a red cardboard blank.
3. Prepare scrap paper and cut a rectangle out of it, which in turn will be several millimeters smaller than a piece of pink cardboard. You should be able to do this: the largest blank is red, the smaller one is pink, and even less from scrap paper.
4. Glue all the blanks to each other as shown in the picture.
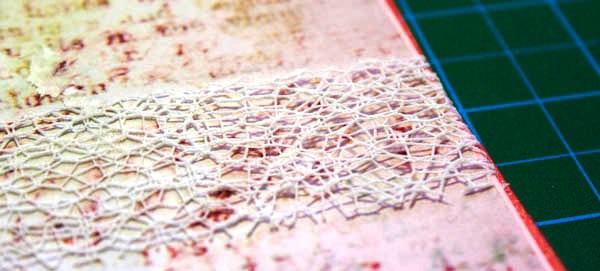
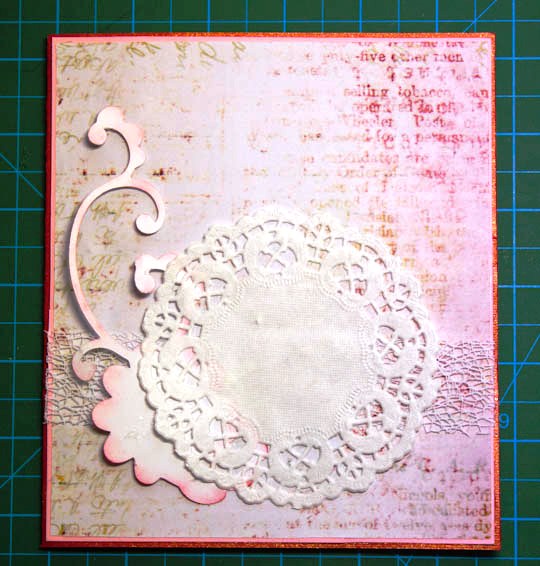
5. Let's start decorating a postcard. The first thing you can do is glue the lace at the bottom of it. Use for this glue moment.
6. We continue to decorate - paste to the card an openwork napkin and paper curl.
Stage II
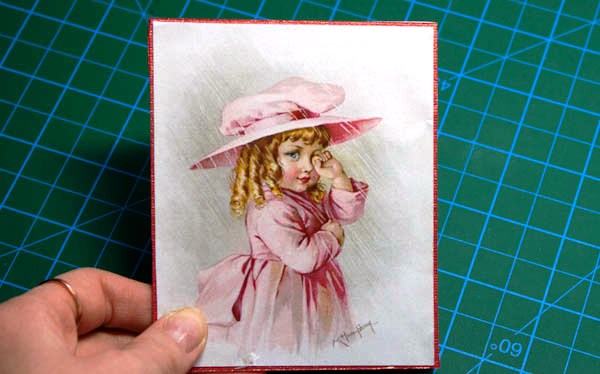
7. Set aside the main postcard for a while to start making a postcard-daughter.
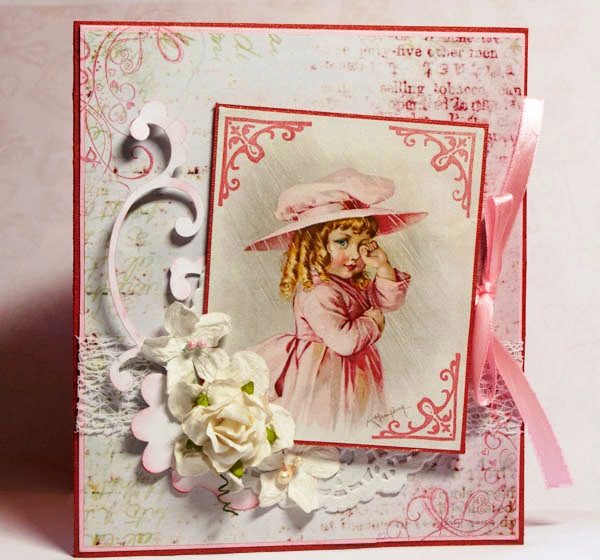
Prepare a beautiful drawing and make a substrate for it using red cardboard. Glue the image to the substrate.
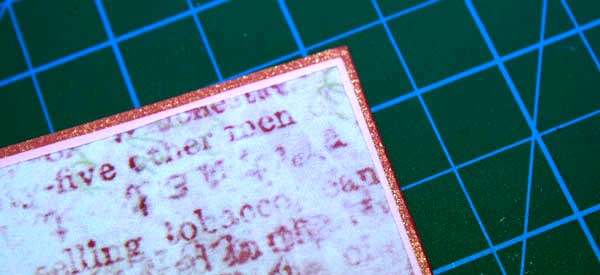
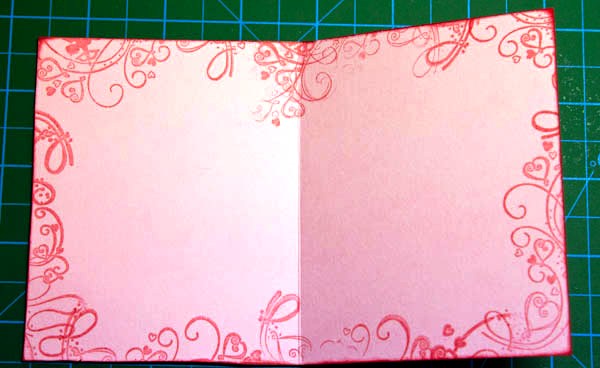
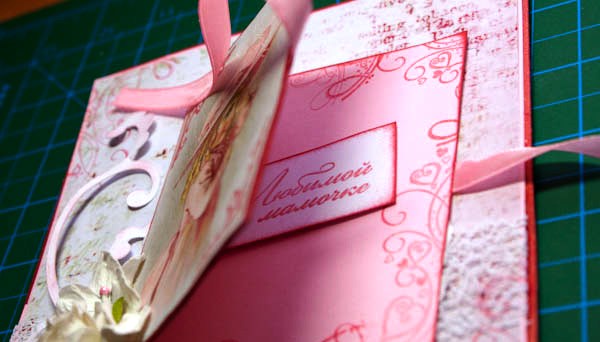
8. Prepare a small blank of pink cardboard (see picture). It can be decorated with beautiful red color patterns. They can be made using stampings or a red pen, drawing the patterns yourself.
9. Glue your drawing with the substrate to the mini-blank. Also stick small pieces of tape on the right and left side of the mini-card. Stick one of the ribbons to the main blank in advance, and then press it with a mini blank (see picture).
10. Glue the entire mini-card to the main card.
11. Glue a few artificial flowers to the corner of the postcard.
12. Write in the main card a beautiful rhyme related to the holiday, and inside the small card write the most sincere, personal wishes and tie a bow.
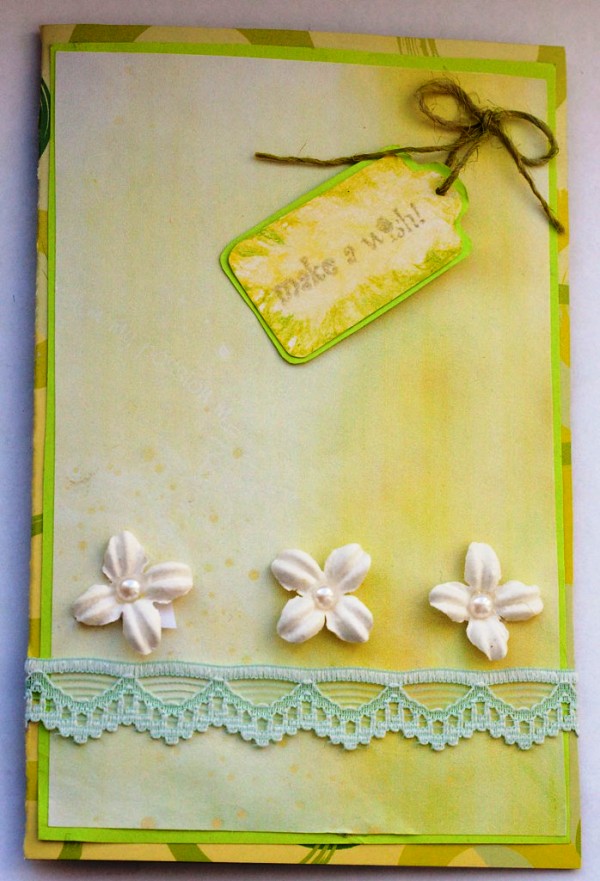
Postcards from March 8 do it yourself. Spring card.
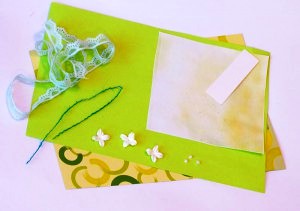
You will need:
Cardboard (preferably with a pattern made in shades of green)
Sheet of office paper (color lime)
White paper (any light tone can be)
Small artificial flowers
Beads
Rope
Lace
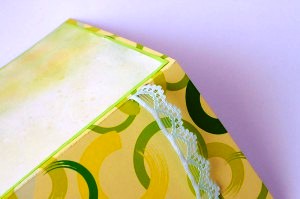
1. Prepare a color cardboard and make a blank from it.
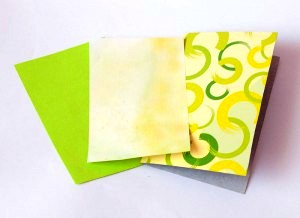
2. Prepare lime and light-colored paper and cut them so that their size is a couple of millimeters smaller than the blank.
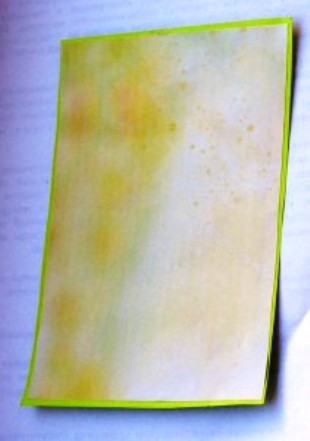
3. Glue the light paper to light green, and then paste everything to the base. Light-colored paper can be slightly tinted or put on it any pattern.

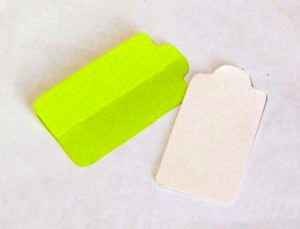
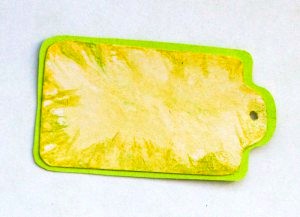
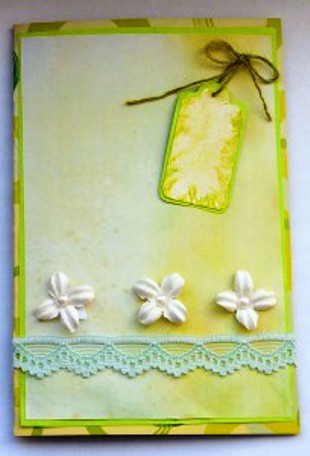
4. Use leftover paper and cardboard to make these little labels. A cardboard tag should be slightly smaller than a paper tag. You can tint light paper with watercolors.
5. Glue your tags and make a hole in them.
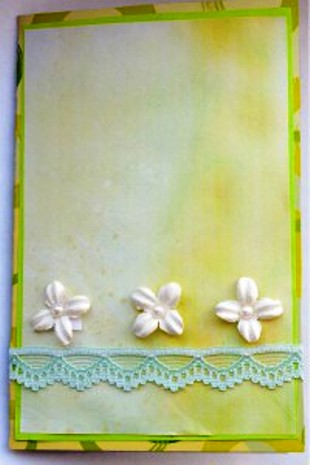
6. In order for you to pass through the lace braid, you will have to make a small cut at the bottom of your postcard.
7. Glue a few artificial flowers over the braid, and glue the beads into their middle.
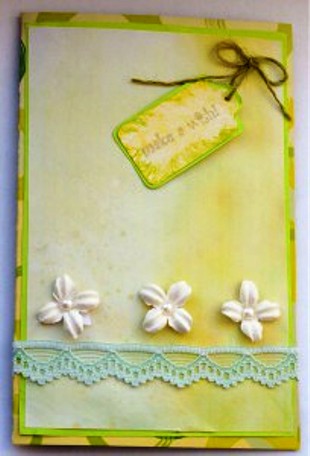
8. Prepare a string and pass it through the hole in the label. Next, tie a bow and paste in the upper right corner of the postcard.
9. Write a short greeting on the label, and you can write any wish inside the postcard.
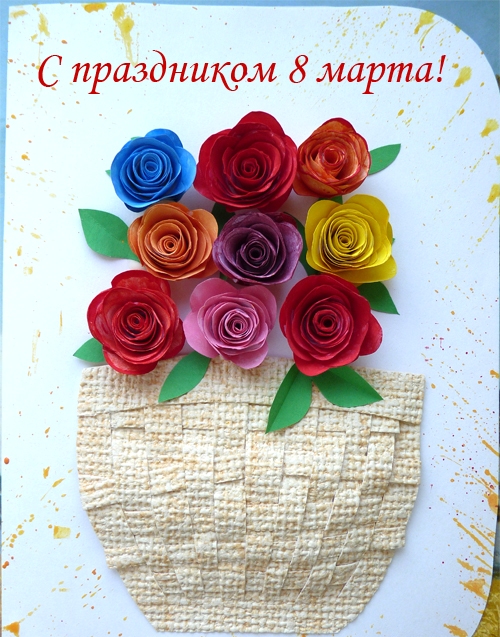
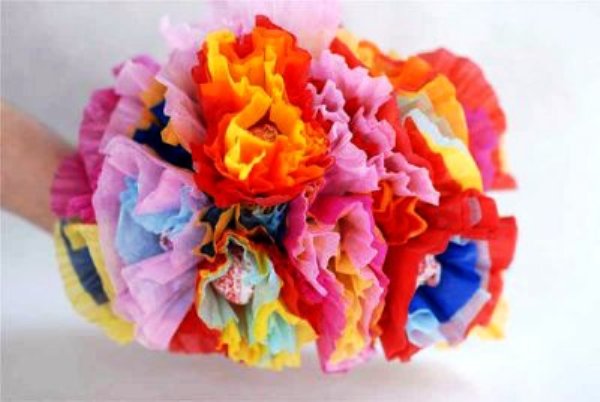
Postcards with your own hands for March 8. Bouquet of roses.
You will need:
White or colored paper
Colored cardboard (thick paper)
PVA glue
Scissors
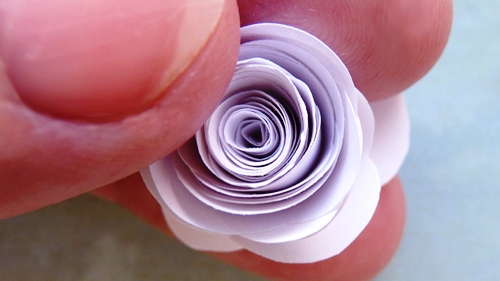
1. The first stage is the manufacture of roses from paper and leaflets. Click on this link to go to the article "How to make a rose" where you can find lots different ways how to make a rose with your own hands.
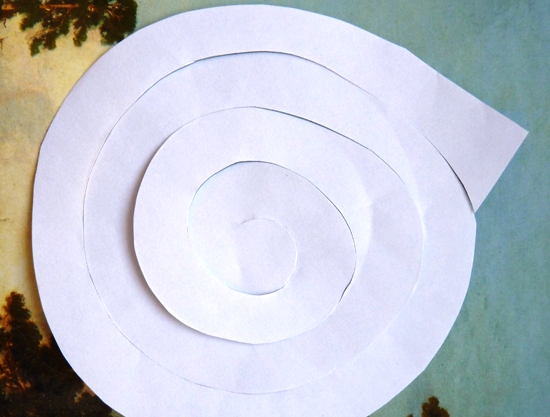
* Cut a circle out of white or colored paper and then cut in a spiral as shown in the picture.
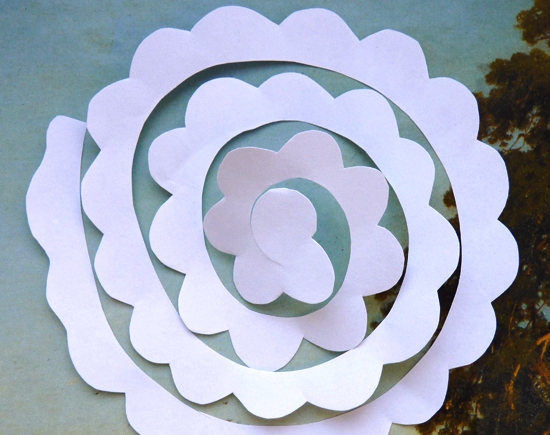
* Use scissors to form rose petals.
* Fold the spiral.
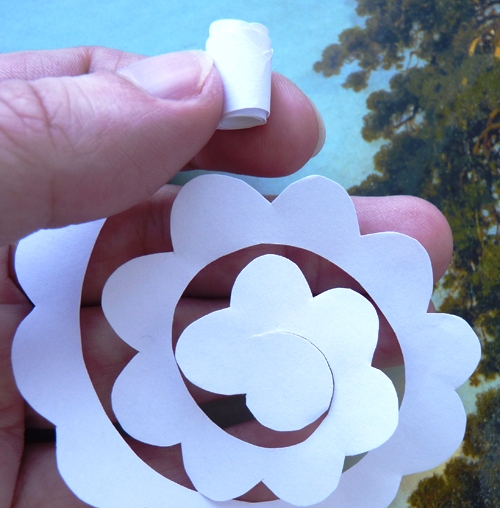
* Apply glue to the edges of the resulting paper tape and glue to the last center tab.
* To make leaves, just draw their shape on green paper, cut and fold in half (see picture).
2. Making a paper basket for roses.
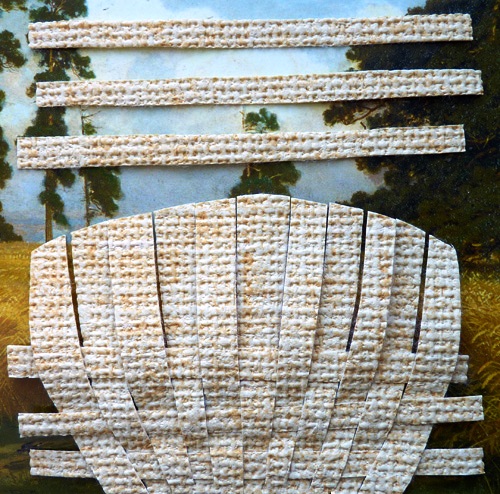
* Cut out the shape of the basket of paper.
* Cook colored paper and cut strips from it.
* Now you need to make vertical cuts in the basket in order to pass the strips through them.
* Glue the ends of the paper strips to the basket.
3. It remains only to glue the basket, roses and green leaves to the card. You can decorate the card with splashes of paint, sparkles, etc.
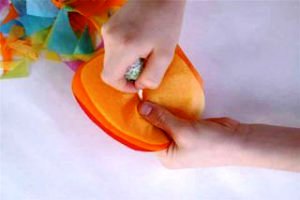
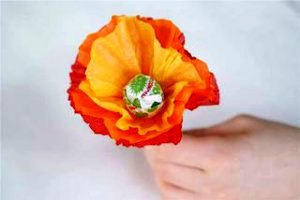
Crafts from paper by March 8. Paper Flowers with Candy
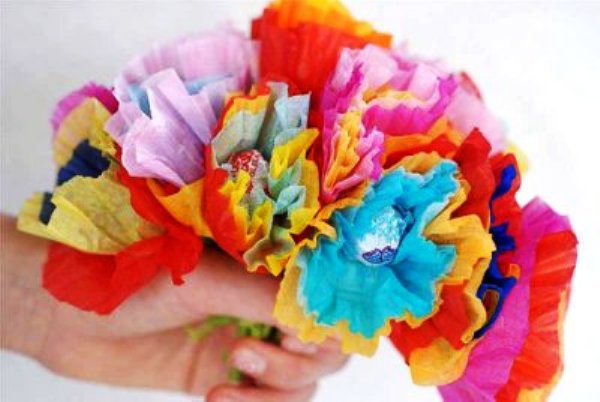
You do not need to be an expert to make such a beautiful, bright, and sweet gift with your own hands.
You will need:
Scissors
Candy on a stick (Chupa Chups, for example)
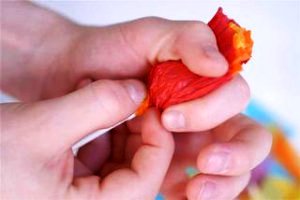
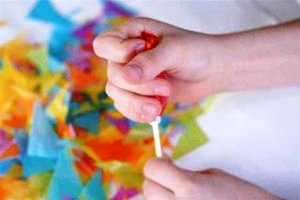
You just need to cut out soft paper circles, pass through them chopsticks from candy and bend the paper up, as if "wrapping" the candy.

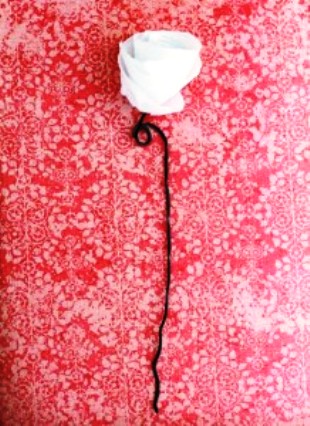
Do-it-yourself gifts for March 8th. Roses.
You will need:
Paper (any - color, newspaper, magazine)
Scissors
Wire
Jewelry (beads, sparkles)
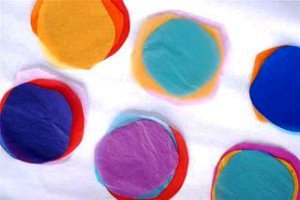
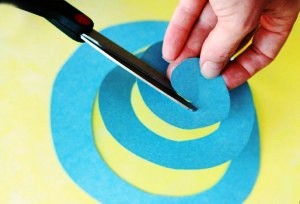
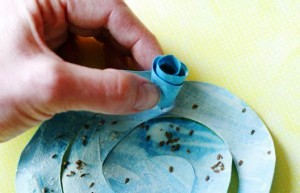
1. Cut a circle out of colored paper. It can be of any size.
2. Start inside the circle with a pair of scissors to cut a spiral (see picture).
You can decorate your flower at the initial stage. In this example, cumin (seeds) was used. Just put glue on a spiral and sprinkle cumin on it.
You can use glitter, flour or other decorations.
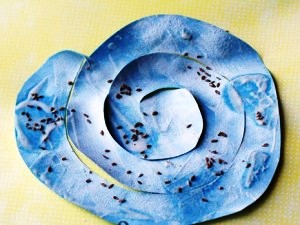
3. Leave the flower to dry.
4. Twist the rose from the outside and stick the end of the paper to the bottom of the flower.

5. It remains to make a couple of roses, attach each to the wire and you get a beautiful bouquet.

March 8 is a long-awaited holiday for all the ladies. On it, as well as on any celebration, it is accepted to give gifts. Since this holiday is spring, it is not surprising that beautiful flowers became the symbol of it, which are bought in large quantities all over the world by men. Therefore, the main subject for gift applique on March 8, of course, is they. This article will show several master-classes on making an application by March 8 with templates that children of pre-school and school age will be able to do.
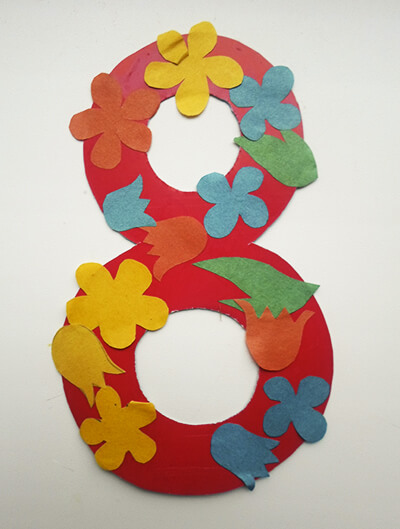
Greeting card for mom
The easiest way to make a gift with your own hands, which will cope the kid in kindergarten. It is better to use ready-made templates to facilitate the task of the child.
It will take:
1) Cardboard sheet;
2) The pattern in the form of numbers 8;
3) Images of flowers;
4) Colored paper;
5) Scissors;
6) A simple pencil;
Stages of work:
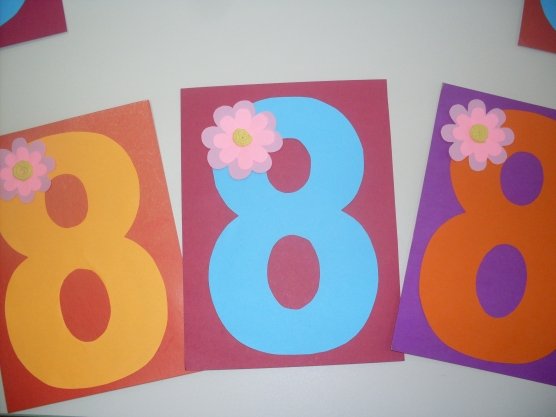
1) A sheet of cardboard is folded in half to form a postcard. Application will do on the cover.
2) We put the ready-made digit template to a sheet of colored paper, draw outlines and cut out. Do not forget about the holes in the eight.
3) Glue the finished figure to the card.
4) Cut out the printed images of flowers and attach them to the number in any order, but so that the image looks organically in the end. Cut the edges of the petals with scissors.
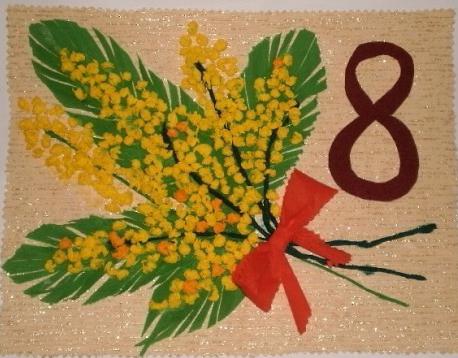
Application "Mimosa"
Even without having yet special skills in the manufacture of crafts, the child in medium group with the help of an adult will be able to make such an application as a gift to mom.
It will take:
1) A sheet of cardboard for the background;
2) Red and green paper;
3) Cigarette yellow paper or plasticine;
4) Glue and tassels;
5) Scissors;
6) Pencil.
Step-by-step instruction:
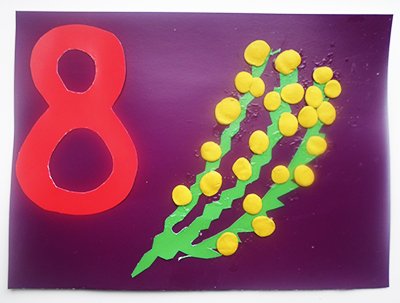
1) Take the selected sheet of cardboard for the background. It is better if it is blue or purple. We decide what size the appliqué will be, cut off extra centimeters, if necessary.
2) Take the pattern of the number eight, apply to a sheet of red paper, outline and cut out the workpiece. Do not forget to cut holes. Then attach it to the right side of the background.
3) Cut out the contours of the branch from green paper. The edges do them in the form of sharp teeth. The easiest way to do this with special relief scissors. Glue the resulting branch next to the number.
4) If the remaining parts of the picture are made of paper, then we cut out small squares from a yellow sheet. You can first cut the strips, and then give them the desired shape. We crush each of the squares into a lump and glue on the twigs, imitating mimosa flowers.
5) If the other parts are made of plasticine, then just roll the small balls and attach to the twigs.
Work is ready!
Volume applications
With children in preparatory group You can make the application more difficult, for example, a panel of volumetric colors. This picture will look original and exactly like your mother or grandmother. There are several ways to do this work.
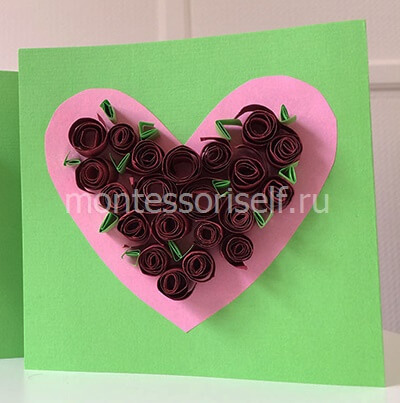
Option One
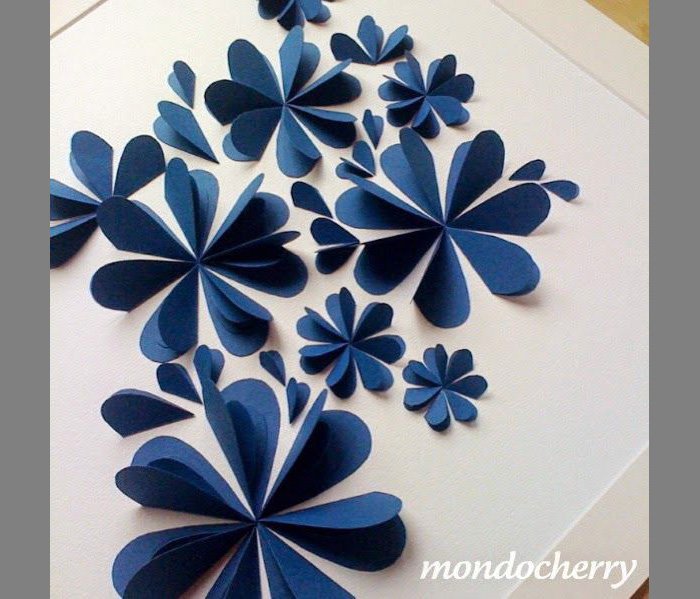
With the help of templates in the shape of a heart, the petals are cut out of colored paper. Fold in half and stick to the picture with a sharp end to the place where the middle of the flower will be. This is a general description of the process.
You can experiment with the shape, size, and shades of colors, finding more and more interesting combinations. An example of work in this technique can be seen in the picture below.
Option Two
For this method will not need ready-made templates, all the details can be cut to the eye.
It will take:
1) Colored paper;
2) Scissors;
4) Pencil;
5) Cardboard.
Stages of work:
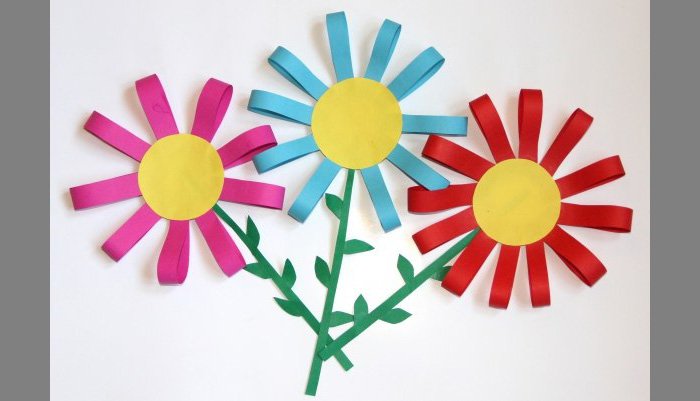
1) From the yellow paper cut small circles that will be the hearts of the flowers.
2) Cut the colored paper into small strips of the same thickness and length. From green paper we make small stalks and leaflets.
3) On a cardboard basis with a pencil we outline the location of the hearts of the flowers. Multicolored stripes bend in half and fasten both ends with each other. Gently glue along the contour of the drawn circle at the same distance from each other.
4) Close the drawn core with a yellow blank. Glue the stems and petals.
5) Similarly form the rest of the flowers.
Option Three
It will take:
1) Sheets of multi-colored two-sided paper;
2) A sheet of green corrugated paper;
3) Scissors;
4) Cardboard;
6) Patterns of petals;
7) Plasticine.
Stages of work:
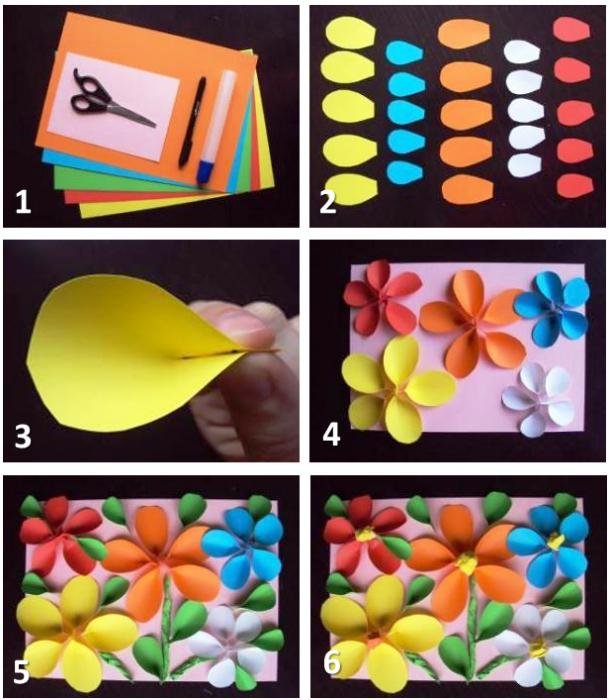
1) Put the patterns of the petals to the colored paper, outline the outlines with a pencil and cut out. The number of required blanks depends on the size of the picture.
2) Similarly, we make leaves of green paper.
3) We make the stalks by twisting the corrugated paper into flagella.
4) Flowers consist of 5 petals. To create a volume effect, each of the petals must be folded in the middle near the base and fastened. Then place on the selected cardboard base and stick.
5) Make the center piece of a lump of clay.
6) Paste the stalks. The leaves are folded in the same way as the petals, and attached to the picture.
Video on the topic of the article
We must succeed - a handbag, a basket with chicks, rainbow leaves. Each craft begins with an idea. At first we think what we want to do and why. Then we select the material for handicrafts - it should be pleasant to both the child and the adult who deals with the child.
If an adult likes the material, if he can pass it on to the children with whom he deals, the result will be amazing.
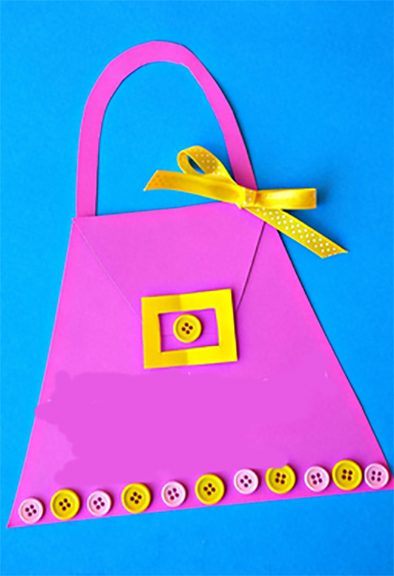
What about in order for fashion mommy make a pink handbag? It turns out to be very simple. We need pink and yellow dense, buttons, small ribbon or bow. Cut out the pink paper base handbag and pen. Glue the yellow buckle and bow. Below we decorate the handbag with colored buttons. A gift for mom is ready!
From foil, cardboard and pieces of crumpled napkin it turns out very beautiful appliqué "eight".
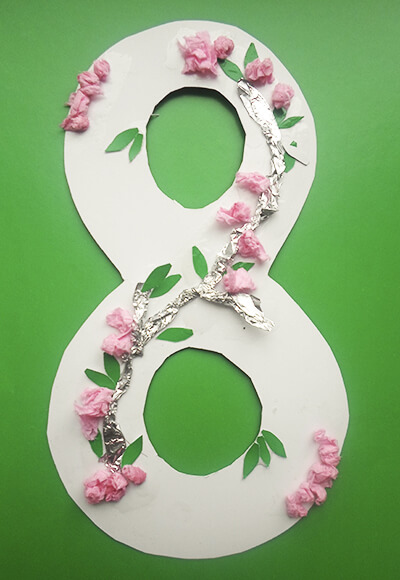
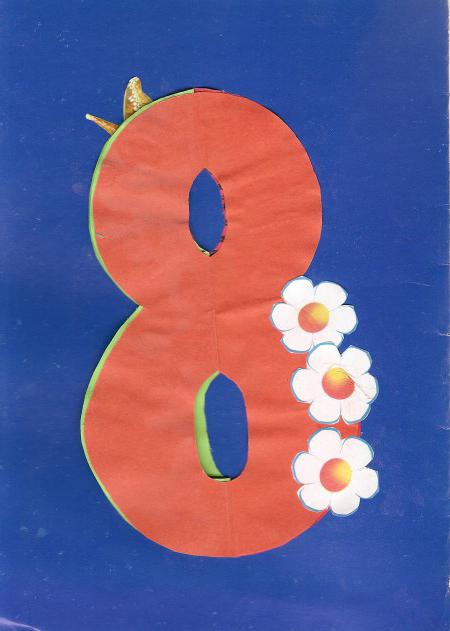
G8 appliqué
For the youngest kids, the applique for March 8 from cardboard eights and flowers made of thin paper is suitable.
![]()
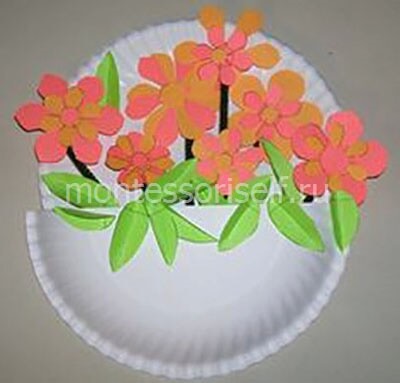
Beautiful application on March 8, "flowers in a vase" is made of corrugated paper and plain cardboard.

We have collected such a collection of ideas for you. We are sure that you will be able to make exactly the application for your mother that will stay in her heart for many years.
The first spring holiday, the holiday of our beloved women: mothers and grandmothers, sisters and girlfriends, is not far off - International Women's Day March 8. And everyone wants to warmly congratulate them on this wonderful holiday and give them beautiful gifts. What to give to our beloved women? What do they love most?
Of course, you can go to some online store selective perfume, and choose, for example, the original perfume. But there is a simpler option - no one, I think, will refuse to receive something as a gift made by children’s hands. And a better gift than probably not found. Bright, colorful - they delight our eyes and make our hearts die. Especially because we also gave the fathers.
And what to depict on applications? Of course, flowers. But there is a great variety of them. Which one is a favorite?
Probably roses, They are loved by all women. Roses are also possible, but spring flowers have always been considered a symbol of spring - mimosa and the blossoming buds of trees, as they are sometimes called, “seals”.
So everything is clear. We will do the application "cats". Moreover, the material for these crafts abound. They can be made from colored paper, from cloth, from cotton wool, sand, grain, plasticine, foam plastic, and from many other materials that fall under your hands.
Applications for March 8. Mimosas
To create such a masterpiece you need a sheet of cardboard, the denser, the better, clay, sequins. During the walk with the baby, find the appropriate twigs, which will be the basis of our crafts. You can also find beautiful leaves to decorate the application. When everything is ready, you can begin the creative process. Let the baby take the blue clay into the pens and remember it a little. Firstly, it is a very wonderful finger massage, secondly, the clay will become softer and easier to work with. Then put it on a cardboard and gradually stretch it over the whole plane of the sheet.
Begin, preferably from the middle to the edges. Next, the twigs found together with the baby will be useful to you, you need to put them in the center and press down a little. This craft is suitable even for the smallest, because you do not need to cut and glue anything.
Around the sticks need to place the buds ("cats"). For this, white or yellow plasticine is suitable, or both. A branch of "cats" is now ready to put it in a vase. A vase is made quite simple, take a simple pencil or any other sharp object, better if an adult does it, and draw a vase. You can do this as shown in the picture, but you can do a little fantasy and you will get much better. Put everything around with sequins.
A sprig of spring tree is ready. It remains to frame it. The frame can also be made from plasticine itself, it is not in the picture. To do this, take the clay of any color roll it into a tube and attach it to the finished crafts.
To find a beautiful convex little button in my mother's casket, there must be a lot of them and press the little button into the plasticine to make a beautiful imprint. To make it easier for mother to hang this masterpiece on the wall, you can take care of the loop on the back of the craft in advance. Now you need to sign a sing and give a gift.
With a sprig of spring! With the March drip!
With greens first! With the last snowstorm!
Happy female congratulations to you!
I wish you happiness, health, good luck!
Gentle and touching - it captivates our souls with its purity and chastity.
Let this application by March 8 warm your beloved mom with your warmth.
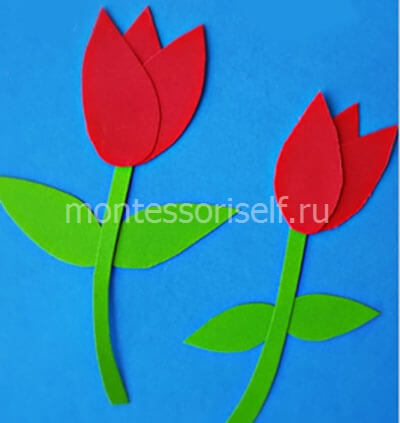
And these poppies can not touch your grandmother's heart. Bright, catchy and passionate - they will raise your spirits, drive away melancholy and anxiety and make you believe that life is beautiful and generous.
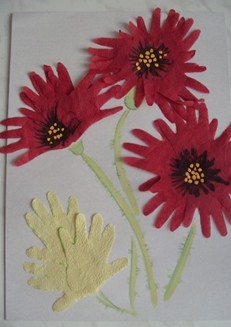 application for March 8 Poppies
 Application can be made of paper or fabric. The leaves and petals of flowers are made from the palm of the child's hand. To make these beautiful poppies, you need to take a cloth or a cloth of two colors (red and green) and black threads. Three to five palm forms are used for one flower. The center can be sprinkled with millet. To petals seemed bulky, you need to stick to the base only the central part of the flower. Then the petals will seem to quiver from the breath of the breeze. And, if you glue the middle of the flower and the tips of the petals, the flower in this case will be convex.
Your younger sister will be very happy about such a fluffy miracle - a duckling. To make an appliqué with such a pretty one, you must first make a lot of finger blanks, circle your baby’s pen and cut
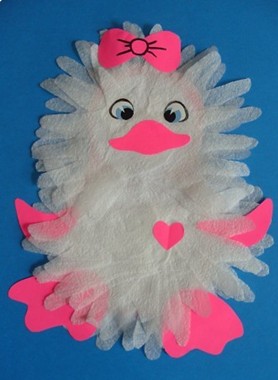 Duckling for sister
 detail. To do this, you need a white cloth or cloth. Then you need to draw the outline of the drawing, glue the foot to the base of the appliqué, and on top of them glue on one after the other several layers of finger applications. They will create a cute fluffy volume duckling. The last thing to glue a cool nose, flirty bow and a nice heart and paws. Duckling ready. He cheerfully looks at us with his mischievous eyes, as if inviting to play with him, swim and dive in the river waters.
And this wonderful flower will please everyone.
Colorful volume application can be made from small tubes. The straw can be obtained by folding a strip of colored paper around the rod for a ballpoint pen. One end of the resulting tubule
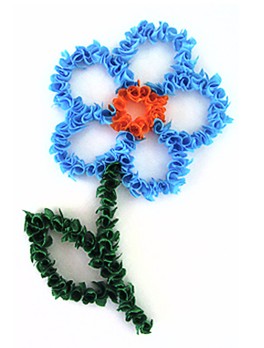 Beautiful volumetric flower from tubules
 press down with your fingers and smear with glue. Make these tubes need a lot. Then draw the outline of the pattern and glue the base of each tube to the base of the appliqué along the outline of the pattern. Then seal the inside of the flower. The core is made in another color - yellow or orange. To add some zest to the appliqués, you can add a few poems, from which any mother will have a tear from the emotion and happiness.
Mommy darling! How do I need you!
Sweet, beautiful, like bright spring.
I adore you, I adore you so much.
Many hugs. With all my heart I love.
And the author’s signature will complete this work: your son (your daughter).
You can make interesting applications for March 8, using the interlacing strips of paper. To get this weave sheet is necessary
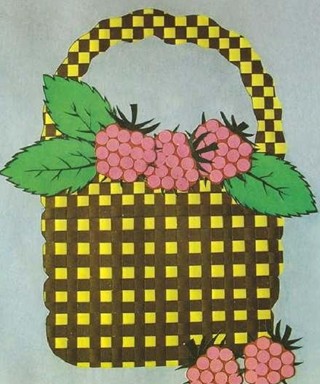 Bulk bag of strips of paper
 of this size, roll in half, draw straight stripes with a ruler and make cuts with scissors so that the edges of the sheet are not cut. Then the sheet to unfold and weave into it colored strips of paper, as intertwining the vine in the basket. The resulting picture will resemble a chessboard. From these pictures you can make beautiful applicationsFor example, a handbag. In the bags you can put beautiful flowers, made with their own hands or clusters of viburnum. In order to make a sprig of viburnum, you need to cut several circles of red color about 50. Then stick them on a piece of the same color in the form of a bunch, then carefully cut. Glue the sprigs of viburnum to the bag and complete this application with a few green leaves, which will create a beautiful contrast and a complete look of the application.
 applications for March 8. Fluffy flower
 This flirty handbag is very useful for lovers of "shopping". She is bright, elegant and quite roomy.
The bag is made using appliqués - weave.
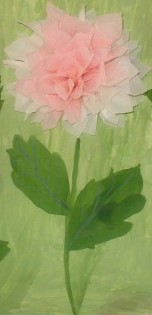
This bright and colorful flower will appeal to all.
It radiates pleasant warmth and positive energy.
To make such an application by March 8, you need to cut a large number of petals and two, more green sheets are possible. Start work from sticking leaves. Then glue the base of the petals, overlaying each other in a circle. Begin to glue the petals from the bottom layer. Toward the end of the work, the last three layers, to give the chrysanthemum volume, you can twist the petals a bit, as it were, into a “pipe”. To stick a flower to the stem and green leaves. Such an elegant flower can make even a baby for his beloved mum if someone from the senior helps to cut out blanks for him. After all small child still do not know how to use scissors. And he will be able to glue the petals and other details of the application, if, of course, one of the adults is around.
So you can make an original poster of congratulations on the holiday of March 8.
Petals of flowers have an oval cut, roll in half and glue the bottom half. The upper half of the petal is not glued. This creates a three-dimensional pattern. In the center of each flower glue the middle of a yellow or orange color. Around each flower should be a few green leaves. In order for the 8th MART inscription to be voluminous, it must be very carefully cut out but not fully, and bend. It turned out almost perfect applications for March 8!
 Application for March 8. Bulk flowers
 We get a volume application of a bouquet of spring flowers. You can even come up with interesting applications from the fabric.
Let them please our eyes and give us hope for all the good.
What kind of gift did you have for March 8? Tell that!
In many countries of the world, all women, regardless of social status and age, are happy to celebrate March 8. And people who are surrounded by the fair sex tend to make this day even more pleasant for them. So, husbands congratulate wives with flowers, brothers of sisters - with small surprises, and children for their mothers and grandmothers do applications for March 8 with their own hands. At the same time, gifts made by themselves deserve the greatest respect, because the child puts his whole soul into them.
Materials and tools
Before you start making any crafts or applications by March 8, you need to collect all the necessary tools and materials for this. Among the main ones, it is worth noting the need for cardboard, preferably white and colored, scissors, plain paper, standard white sheets, glue and napkins for wiping hands and products. If you plan to make volumetric children's crafts by March 8, then in addition to the listed materials you will need wire or wooden skewers for flower stalks, green tape tape, plastic cups of yellow and red colors, corrugated paper of several colors - green, brown, yellow, red, purple.
Of course, the child will not use all of the above materials at the same time, but it is important that they are on hand in case he wishes to make several handicrafts for a gift to his mother.
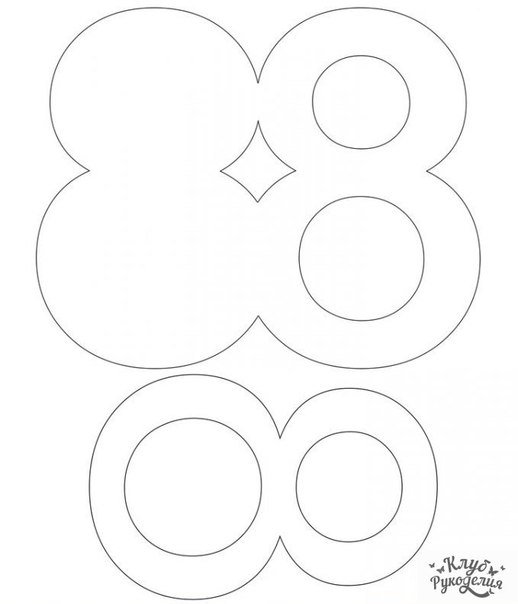
"8" for crafts: template
Since we are talking about various applications, postcards and other handicrafts that are prepared by children for their mothers, grandmothers and aunts as presents on March 8, you simply cannot do without a template for making the main figure of the holiday. For this purpose, it is best to use plain cardboard, and then trace the craft around the contour, laying it on a sheet of colored paper, directly during the manufacture of the appliqué by March 8. The patterns of eights do not necessarily have in the hands of each child, there are quite a few of them per group.
For the manufacture of "8" it is necessary to fold the cardboard in half, on one side of it from the edge where the bend passes, draw a half of the digit, which should consist of an external and internal contour. Next, cut the pattern and flatten it. Thus, it will turn out the eight, which will facilitate the further work of children during the manufacture of applications by March 8 with their own hands. A figure-eight cut out of colored paper can be tied with a ribbon in the middle so that the finished crafts look more interesting. This figure can be glued on a card, and on a vase with flowers, and on many other crafts by March 8.

Chamomile for postcard
Chamomiles are one of the most delicate and beautiful flowers, which is why they are perfect for making applications by March 8. It will not be difficult for the child to make patterns for them, since every child has repeatedly seen this flower.
For the manufacture of daisies need on a white sheet of paper, folded in half, to draw a flower with lots of long and narrow petals, it is important that they do not touch. Then cut the daisy along the contour, receiving two blanks. Such daisies need five, preferably different sizes.
Folding postcards to March 8
When gluing a chamomile on a postcard, you will need to lay one on top of each other to give a flower a volume. In this case, a more original look will have a finished application by March 8. The postcard also provides for a figure of eight, cut out of bright paper according to the pattern described above, 5 yellow circles to form the centers of flowers and 5 leaves cut out of green paper.
Next, a sheet of colored cardboard must be folded in half, on the top of the figure eight, next to it from different sides, a little covering it, daisies, and to them already - leaves. In order to make the postcard more interesting, the edges of the centers and leaves should be cut a little with scissors.
Volume paper application
Due to the fact that at the beginning of spring all the flowerbeds in our latitudes are still “gray”, an application of “March 8” made of paper represented by bulk flowers can be an excellent choice. To do this, from colored double-sided sheets you will need to cut a lot of petals, round at the top and pointed at the bottom. Similarly, the leaves should look the same, only for their manufacture should use green paper. For the stalks you need to twist the flagella of corrugated paper.
Each flower should consist of 5 petals. In order for them to look volumetric, each of them should be folded in the middle at the base and glued, and then placed in an appropriate order on the base and glued. The middle of the flowers to draw a contrasting paint. Stick the stalks and leaves, after folding them similarly to the petals. Here is the application for March 8! A postcard with voluminous flowers will surely please the mother or grandmother of the child, while not requiring too much effort from him.

Sprig of mimosa: handicraft of corrugated paper
A sprig of mimosa made of corrugated paper made by a child can be an excellent gift for mother. To do this, on a cardboard of any color except green and yellow, draw a branch with a simple pencil. In order for the children to do this, you can show them a picture of a plant or draw it on the board.
Next, from a corrugated paper, it is necessary to cut a three-centimeter strip with a length corresponding to the length of the branches drawn. The strips must be twisted in the form of a stalk. Then, on one side, spread each of them with glue and fix it on the contours of the painted branch. It should start with the main one, and finish with the smallest ones that are present in the application by March 8. With your own hands, you will need to cut out yellow squares 4x4 cm in size from paper, which you need to roll into balls. It will be Each finished ball must be spread with glue on one side and glued to a branch, forming a composition.
What is mimosa without leaflets? After all, then unfinished get the application "March 8." Senior group kindergarten easily cope with this task. After all, all that is needed is to cut the wide leaves, make their edges serrated and glue at the base of the branch. At the final stage you need to make a frame. To do this, it is necessary to cut out two-centimeter strips from a cardboard with contrasting colors, which is the main background, and stick them around the perimeter of the finished picture.
bouquet of lilies
By March 8, children's crafts can be presented in the form of not only flowers pasted on the base, but also whole bouquets placed in a vase. One of the most interesting and easy to manufacture are lilies. In order to get the petals of this flower, the child needs to place his palm on a white sheet of paper and with a simple pencil to circle it around the contour and then cut it out. It is assumed that the bouquet will consist of three flowers, respectively, such details will need three. To obtain the middle of a lily, a long strip should be cut from a yellow plastic cup. It should be narrow in the middle and extend to the edges.
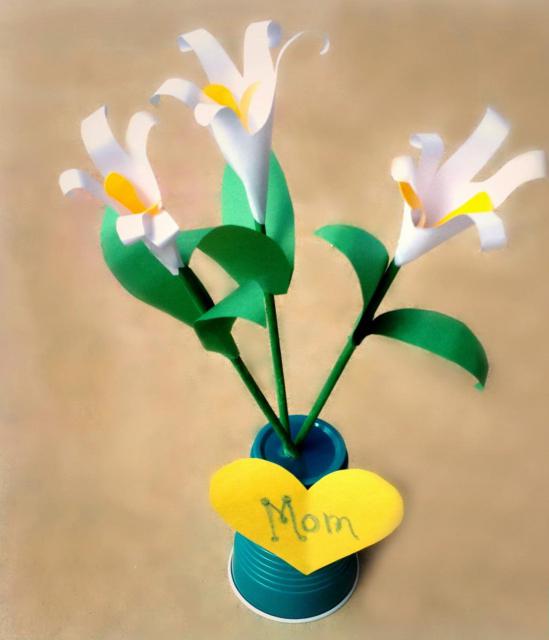
From green colored paper to cut long and wide leaves. For each flower, you will need 2 leaves, that is, there should be six of them altogether. To get a stem, wire or wooden skewers should be wrapped with tape.
Folding lilies in a bouquet
So, proceed to the assembly of the bouquet. At the upper end of the stem, it is necessary to fix the middle of the lily with glue and wrap around the palm print carved from white paper. If you want to get a lush flower, then these prints will need two. Slightly lower than the middle of the stem should be glued on both sides of the leaves. As a vase, you can use a plastic cup, turned upside down. Ready lilies should stick in the bottom of the cup. Thanks to this, the craft will be stable and will always be able to please the eye.