open wide space for the imagination of the baby. Draw only with a brush? But it's boring! We have gathered a lot of ideas for conducting unusual classes in creativity in kindergartenin primary school and family parties.
Drawing with a secret in three pairs of hands
When your child is 4 years old, we strongly advise you to resort to this method. It consists in the following. Take a rectangular sheet of paper, 3 pencils. Adults and children are distributed: who will draw the first, who is the second, who is the third. The first begins to draw, and then closes his drawing, bending the leaf on top and leaving a little, some part, to continue (neck, for example). The second, seeing nothing but the neck, continues, naturally, the torso, leaving only part of the legs visible. The third finishes. Then the whole sheet opens - and it almost always turns out to be funny: from a mismatch of proportions, color schemes ....
Blueprint
It is to teach children to make blots (black and multi-colored). Then a 3-year-old child can look at them and see images, objects or individual parts. “What does your or my blot look like?”, “Whom or what does it remind you of?” - these questions are very useful, because develop thinking and imagination. After that, without forcing the child, but by showing, we recommend to proceed to the next stage - circle or draw the blots. As a result, the whole plot may turn out ...
Drawing together on a long strip of paper
By the way, it is useful to change the paper format (i.e. not only to give a standard). In this case, a long strip will help to draw together, without interfering with each other. You can draw isolated objects or plots, i.e. work close by. And even in this case, the child is warmer from the elbow of the mother or father. And then it is advisable to go to the collective drawing. Adults and children agree who will draw what to make one plot ....
Drawing yourself or drawing your favorite toys from life
Drawing from nature develops observation, the ability to no longer create, but to portray by the rules, i.e. draw so that it was similar to the original and proportions, and shapes, and color. Suggest first draw yourself, looking in the mirror. And certainly looking at the mirror many times. Better yet, show me how you, adults, will draw yourself, certainly looking at the mirror many times. Then let the child himself choose an object, This can be a favorite doll, a bear or a car. It is important to learn to observe for a long time by comparing parts of the subject. And further. If a child moves away from nature, brings something of his own, as a result of which a completely different object or toy will appear - do not be upset. Praise your baby: “You drew a new car today! Probably, you want this? ”But it is important to ask at the end of such drawing:“ What is the difference between a painted car and this one? ”...
"I paint my mother"
It would be good to continue drawing from nature or drawing from memory (family members, relatives and friends can become objects for such an image). Photographs or conversations about the characteristic features of the appearance of absent relatives can be used as supporting material ... Photos are taken and viewed. Conducted conversation: "What grandmother Valya? What is her hair? Hairstyle? Favorite dress? Smile? ”And the process of co-creation begins. After a time, you can offer to draw on the memory of girlfriends. When there are enough drawings with the image of relatives and friends, we advise you to organize a mini-exhibition "My family and friends", where the first portraits of the preschooler are appreciated ....
Bitmap
Children like everything unconventional. Drawing dots refers to unusual, in this case, techniques. For implementation, you can take a pen, a pencil, put it perpendicular to a white sheet of paper and start drawing. But here is the best way to get bitmap colors. That's how it is done. A match, cleared of sulfur, is tightly wound with a small piece of cotton and dipped in thick paint. And then the principle of applying points is the same. The main thing is to immediately interest the child ....
Foam drawings
For some reason, we all tend to think that if we paint with paints, then we must also paint with a brush. Far from everything, say trizovtsy. Foam rubber can help. We advise you to make a variety of various small geometric figures out of it, and then attach them with thin wire to a stick or pencil (not sharpened). The instrument of labor is ready. Now it can be dipped in paint and using a stamping method to draw red triangles, yellow circles, green squares (all foam rubber, unlike cotton wool, is well washed). Initially, children will randomly draw geometric figures. And then propose to make the simplest ornaments of them - first from one type of figures, then from two, three ...
Mysterious pictures
Mysterious pictures can be obtained as follows. A cardboard about 20x20 cm in size is taken and folded in half. Then a half-woolen or wool thread is selected about 30 cm long, its end is dipped in thick dye at 8-10 cm and clamped inside the cardboard. It should then move inside the cardboard with this thread, and then remove it and open the cardboard. It turns out a chaotic image, which is considered, circled and dorisovyvayut adults with children. Extremely useful to give the names of the resulting images. This is a difficult mental-speech work in combination with the visual will contribute to the intellectual development of children of preschool age ....
Chalk drawing
Preschoolers love variety. These opportunities provide us with ordinary crayons, sanguine, coal. Smooth asphalt, porcelain, ceramic tiles, stones - this is the basis on which fine chalk and coal lays. So, asphalt has to capacious image plots. They (if there is no rain) can be developed the next day. And then plot the stories. And on ceramic tiles (which are sometimes stored in the remains somewhere in the pantry), we recommend painting with small pieces or charcoal, small objects. Large stones (such as volons) are asked to decorate them under the image of the head of an animal or under the stump. It depends on what or who the stone resembles ...
Method of magic drawing
This method is implemented as follows. The corner of a wax candle on white paper draws an image (herringbone, house, and maybe a whole plot). Then a brush, or better cotton wool or foam rubber, paint is applied on top of the entire image. Due to the fact that the paint does not fall on the bold image of a candle - the picture appears suddenly before the eyes of the children, manifesting itself. You can get the same effect by first drawing with office glue or a piece of laundry soap. In this case, an important role is played by the selection of the background to the subject. For example, a snowman painted with a candle is better to paint over with blue paint, and a boat with a green one. No need to worry if candles or soap will crumble while drawing. It depends on their quality ....
Painting of small pebbles
Of course, most often the child depicts pas on a plane, on paper, less often on asphalt, tiles of large stones. Plane image of the house, trees, cars, animals on paper does not attract as much as the creation of volumetric own creations. In this regard, ideally used sea pebbles. They are smooth, small and have a different shape. The very shape of a pebble sometimes prompts the child what image to create in this case (and sometimes adults will help the little ones). It is better to paint one pebble under the frog, another under the bug, and a wonderful fungus will come out of the third. Bright thick paint is applied to the stone - and the image is ready. And it is better to finish it like this: after the pebble dries, coat it with a colorless varnish. In this case, the shiny beetle or frog made by child's hands shines brightly. More than once this toy will participate in independent children's games and will bring considerable benefits to its owner ....
Finger painting method
Here is another one of unusual drawing techniques for children or way to portray the world: with your fingers, palm, foot, and maybe your chin, nose. Not everyone will take this statement seriously. Where is the line between prank and drawing? And why should we only draw with a brush or felt-tip pen? After all, a hand or individual fingers is such an aid. Moreover, the index finger of the right hand listens to the child better than a pencil. Well, if the pencil is broken, the brush is wiped off, the markers are over - and I want to draw. There is one more reason: sometimes the subject simply asks for a child’s palm or finger. For example, a child’s drawing a tree is better done with his hands than with other implements. With his finger, he will bring out the trunk and branches, then (if autumn) will apply yellow, green, orange paints on the inner side of the hand and draw a purple-red tree on top. It is good if we teach children to use their fingers rationally: not with one index finger, but with all ....
Nitography method
There is this method mainly for girls. But this does not mean that it is not suitable for children of the opposite sex. And it is as follows. Initially, a screen of 25x25 cm is made of cardboard. On the cardboard, either velvet paper or plain-colored flannel is glued. For the screen it would be nice to prepare a cute bag with a set of wool or wool blend in different colors. This method is based on the following peculiarity: strings having a certain percentage of wool are attracted to the flannel or velvet paper. You only need to attach them with light movements of the index finger. From these threads you can make interesting stories. The imagination, sense of taste develops. Especially girls learn to skillfully pick colors. Some colors of thread are suitable for the light flannel, and completely different colors for the dark flannel. So begins the gradual path to the feminine craft, the handicraft much needed for them ....
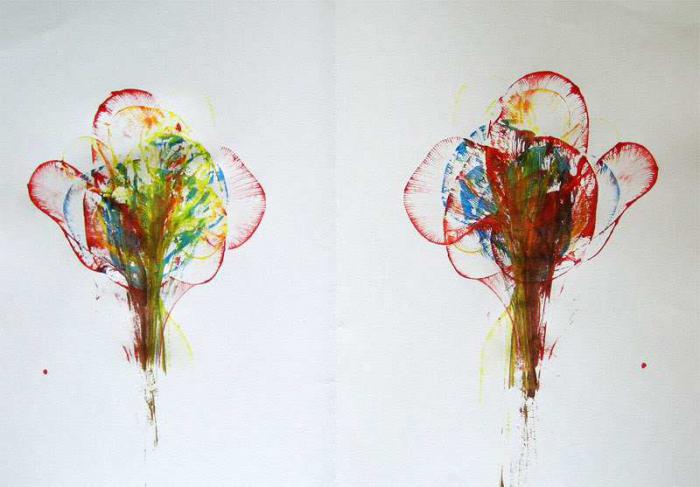
Monotopy method
Two words about this unfortunately rarely used method. And in vain. Because it harbors a lot of tempting for preschoolers. In short, this image is on cellophane, which is then transferred onto paper. On a smooth cellophane I paint with a paintbrush, or a match with a cotton swab, or a finger (no need for uniformity). The paint should be thick and bright. And immediately, until the paint is dry, turn the cellophane image down onto white thick paper and, as it were, blot the design and then pick it up. It turns out two pictures. Sometimes the image remains on cellophane, sometimes on paper ....
Drawing on wet paper
Until recently, it was believed that you can only draw on dry paper, because the paint is diluted enough with water. But there are a number of subjects, scenes, images that are best drawn on wet paper. We need ambiguity, vagueness, for example, if a child wants to portray the following topics: “City in a Fog”, “I Dreamed Dreams”, “It Rides”, “Night City”, “Flowers behind a Curtain”, etc. You need to teach a preschooler to make the paper a little wet. If the paper is too wet - the picture may not work. Therefore, it is recommended to soak a ball of cotton wool in clean water, squeeze it and hold it either on the whole sheet of paper, or (if so required) only on a separate part. And the paper is ready to produce obscure images ....
Fabric images
In the bag we collect the remnants of tissues of various patterns and various qualities. It is useful, as they say, and chintz, and brocade. It is very important to show with concrete examples how the pattern on the fabric, as well as its dressing, can help to depict something very bright and at the same time easily in the plot. Let's give some examples. So, on one of the fabrics are flowers. They are cut along the contour, glued (only with paste or other good glue), and then they paint over a table or a vase. The capacious colorful image turns out. There are fabrics that can serve well as a house or trunk of an animal, or a beautiful umbrella, or a hat for a doll, or a handbag ....
Volume application
Obviously, children love to do the appliqué: cut out something and stick it, getting a lot of pleasure from the process itself. And they need to create all the conditions. Along with the planar appliqué, teach them how to do volumetric: volumetric is better perceived by a preschooler and more realistic reflects the world around it. In order to obtain such an image, the applicative colored paper, then slightly straighten and cut the desired shape. After that, barely stick and, if necessary, finish the individual parts with a pencil or felt-tip pen. For example, make a bug so beloved by children. Remember the brown paper, slightly straighten it, cut out the oval shape and glue it, and then paint the head and legs ....
Draw using postcards
In fact, almost every house has a mass of old postcards. Retrieve with your children old postcards, teach them to cut out the necessary images and stick them to the place in the plot. Bright factory image of objects and phenomena will give even the simplest drawing a complete decoration. A three-, four- or even five-year-old child is sometimes difficult to draw a dog and a beetle. They can be taken ready, and let them finish the sun, the rain and be very happy for the dog and the bug. Or if, together with the children, to cut out a postcard and stick a fabulous house with a grandmother in the window, then the preschooler, focusing on his imagination, knowledge of fairy tales and visual skills, will undoubtedly finish drawing something to him ...
Learning to do the background
Usually children draw on white paper. So clearly seen. So faster. But some scenes require background. And I must say, on the background made in advance, all children's work looks better. Many children make the background with a brush, besides ordinary, small. Although there is a simple and reliable way: to make the background cotton or a piece of foam rubber dipped in water and paint ....
Collage
The concept itself explains the meaning of this method: it gathers several of the above. In general, we ideally think the following: well, when a preschooler is not only familiar with various image techniques, but does not forget about them, but uses it to the place, fulfilling a given goal. For example, one of the children 5-6 years old decided to draw a summer, and for this he uses a bitmap (flowers), and the child draws the sun with his finger, he cuts fruits and vegetables from cards, depicts sky and clouds, etc. There is no limit to perfection and creativity in visual activity. English research teacher Anna Rogovin recommends everything that is at hand to use for exercises in drawing: draw with a rag, paper napkin (folded many times); paint with dirty water, old tea brewing, coffee grounds, squeezing berries. It is also useful to paint cans and bottles, coils and boxes, etc ....
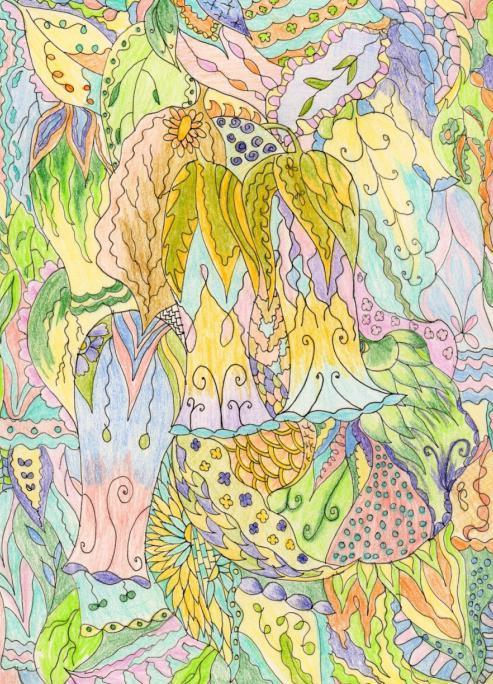
Activities in the visual arts gives you the opportunity to enjoy positive emotions, to feel like the master of your creativity. Children study and learn to know the world around them by copying it. Their drawings reflect a personal attitude to everything happening around. A variety of forms, methods and techniques of work on the visual activity develops the artistic abilities of the child. This article presents some types of non-traditional drawing techniques.
What is unconventional drawing?
This is an art that is not based on traditions, does not adhere to them, and is distinguished by non-bouncy, originality. Drawing in an unconventional style fascinates, fascinates, delights and surprises children. After all, unusual materials are used here, and most importantly, there is no room for the word “no”. You can represent what you want, how you want and what you want. Moreover, it is not forbidden to come up with new technique image images.
Non-traditional drawing techniques in kindergarten schools teach children to express their ideas freely, without any restrictions. Children's fears recede, self-confidence appears. The unusual nature of non-traditional painting is that it allows children to quickly get the desired result.
What does the image technique mean when creating a child's drawing?
In the works of children, the world around them opens every time in different ways. It depends on the inner state of the little artist: on his desires and feelings. Children are more prone to emotion. In their imagination such images arise that defy any explanation. They can draw a red elephant, yellow rain, a running house.
Why does the child want to create, what motivates him to this? First of all, of course, an imaginary image in his mind. At first glance, everything seems to be simple: I saw and painted. But in fact, this path is very difficult for a child, and requires a lot of knowledge and impressions from him. This is both emotional experience and the ability to be surprised, to observe.
Drawing. Unconventional technology. Senior group
The image drawing on paper with pencils or paints helps the child to prepare for the educational process at school. Indeed, during the classes children show their individuality. Properly organized drawing lessons develop the child’s intellectual abilities, correct mental processes. And this is not by chance. In such classes, preschoolers have the opportunity to confidently assess their strength, which is very important for the future school community. The development of fine motor skills of hands contributes unconventional drawing. Children senior group kindergarten learn to paint with fingers, wax, palms, foam, watercolor. The guys with great interest draw with the method of blottography, bitmap images, prints, splashing.
Thread counting
To write a picture in this technique a brush is not needed. An unconventional drawing technique, the photo of which is presented to your attention, is attractive in that there are no strictly defined canons here. For example, this blob needs to be drawn in a compulsory round shape. Using nontraditional drawing techniques in the classroom, there are ample opportunities for children's imagination.
So, to work need threads, paint and white paper. First, the thread should be painted in the color that you like. Then spread it out on a prepared sheet of paper in a chaotic manner, but so that the tip is left behind the field. Cover with another sheet from above and pull out the thread. There will be spots and lines of fancy shape. With the help of a pencil, they easily turn into the desired image.
Sprinkling
Nontraditional drawing techniques for children are very diverse. One of them is spraying, or splashing. In this technique, drawing should be done with a stiff brush or toothbrush. To get some kind of image, you first need to dip the brush in gouache, and then spray it all over the sheet. Small droplets are obtained, which sometimes merge into large spots. It is enough to take a pencil and draw a favorite character or object. If the brush is dipped in toothpaste and sprayed, it will snow.
Monotype
Differ in a big variety unconventional technology drawing Monotype is one of them. This is perhaps the most magical drawing genre: and not painting, and not graphics, but something between a focus and a beautiful fairy tale. Children's unconventional drawing techniques allow free expression. This method of drawing is very tempting for preschoolers, although it is rarely used in art classes. What is it?
This technique is used if you want to get a mirror image. With its help, a reflection on the water is drawn, objects that are located symmetrically. First, the picture is depicted on a smooth cellophane. To do this, you need a soft brush or a match wrapped in cotton. In extreme cases, you can draw with your finger. The paint should be used bright and thick, so that it does not spread. Further action is as follows: until the paint is dry, on the white sheet of thick paper, the cellophane is turned upside down and, as it were, propped up. Then carefully, so as not to smudge, rises. It turns out two identical pictures: one on paper, the other on cellophane.
Scratchboard
This word translated from French means “to scratch, scrape”, hence another name for this technique - scratching. To perform a pattern in this technique, you need to fill in the cardboard with paraffin, apply mascara, wait until it is completely dry and scratch the desired pattern.
Aquatipia
Drawing in this technique is carried out with the help of water. To do this, on thick paper depicted a large gouache. When the paint is dry, the whole picture is covered with black ink and appears in the water. Gouache will be washed off with water, and the mascara will remain. Non-traditional drawing techniques work wonders. Flowers drawn by this method are especially beautiful.
Water seal
This is a peculiar drawing method. For work you will need a bath with water. Paint of different colors is poured directly on its surface, and a landscape sheet of paper is placed on top of it. The image will turn out, it can be finished with strokes using a brush.
Drawing a candle or wax crayons
A lot of names have non-traditional drawing techniques. One of them is drawing a candle. To do this, you need to color a sheet of white paper with pencils of different colors. Then we draw a candle with a house, a star or some other object or image. After that paint our drawing with watercolors.
Dots
Non-traditional drawing techniques are very popular with children. Drawing a picture with dots refers to an unusual reception. To do this, take colored pencils or felt-tip pens and dots are put on a white sheet of paper. But it is better to do it with paints.

The match is cleared of sulfur, is wound on the tip of a piece of cotton wool, dipped in paint and put points.
Drawings foam
For many people, painting with paints is associated with a brush. But this is not quite the right judgment. After all, instead of a brush, you can chop geometric shapes from foam rubber, attach them to a non-hardened pencil or any even stick. Homemade brush ready. Then each figure is dipped in paint and stamped on paper. Thus, circles, triangles, rhombuses are obtained. Of these, you can make an ornament.
Chalk drawing
Children love when diversity is brought into their lives. This can be done with ordinary chalk or coal. They fit well on asphalt, ceramic tiles, stones, porcelain. Capacious images of plots to draw well on asphalt.
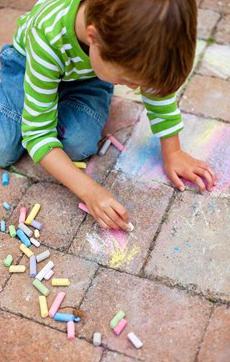
If the work is not finished, you can continue the next day. Of course, there may be disappointment if it rains and removes the entire drawing. According to the drawn plots children make up entire stories. On a ceramic tile it is convenient to depict small objects, patterns. But on large stones - the heads of fabulous animals.
Reprint
The usual material in use - potatoes - can be depicted on paper animals. For this you need to make a signet from a vegetable. The potatoes are cut in half and on the smooth side of the pen draw an animal or object. Then the tip of the knife neatly cut along the contour to a height of 1.5 centimeters, attach the handle and the seal is ready. The child applies the signet to the foam with paint, then applies the imprint to the paper. If the paint color needs to be changed, another signet and foam rubber are taken. This drawing technique is especially popular with children. After all, one and the same object can be depicted as many times, and make up the whole composition from it.
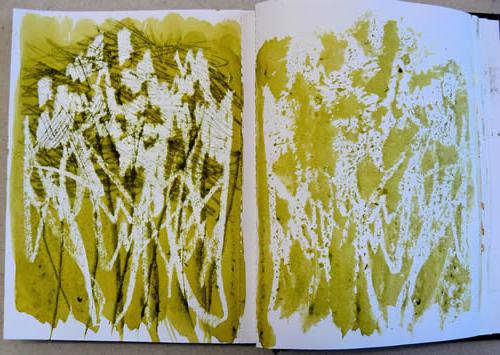
Leaf prints
Conducting classes with children, you can use a variety of non-traditional drawing techniques in preschool. In early spring, when young sticky leaves are blooming on the trees, and in late autumn, when they change color and fall off, the child watches them with interest. Therefore, when in class children are invited to print a real piece of birch or maple, they do it with great pleasure. First you need to paint a piece of paint, and then apply colored side to white paper. Every time you should take another sheet. So the streaks will be better imprinted. If the stem is not, no problem. It can be easily drawn with a brush.
Bloating
If you need to depict shrubs, trees, unusual fabulous plants or corals, use this technique. Paint should be put on a sheet of paper and inflated with a cocktail tube according to the intended image. The picture is bright, expressive. This technique is especially suitable for those children who have difficulty in expressing their creativity through the line.
We draw on wet paper
Types of non-traditional drawing techniques are so diverse that for each child individually you can choose the most interesting and fascinating method for him. One of these is the image drawing on wet paper. The fact is that until recently it was considered possible to paint only on dry paper, as the paint diluted with water already moisturizes it.
But there are such plots, images, objects in which it is necessary to introduce vagueness, uncertainty. For example, a fog, a dream, a night. However, the paper should not be too wet, otherwise the drawing will not work. All paper dipping into the water is not necessary. It is enough to wet a piece of cotton, squeeze it and hold it over the surface of the sheet or its individual parts. The paper is prepared for work, you can proceed to the image of images.
Hand drawing
Children of the older kindergarten group learn with pleasure this method of non-traditional drawing. After all, the work uses fingers, which the child drops into gouache and begins to draw them without any brush. Each finger can be dipped in a different color of paint. Thus, the whole set of brushes turns out. And if you paint the palm of your hand and put it on the paper, it will have an imprint on it.
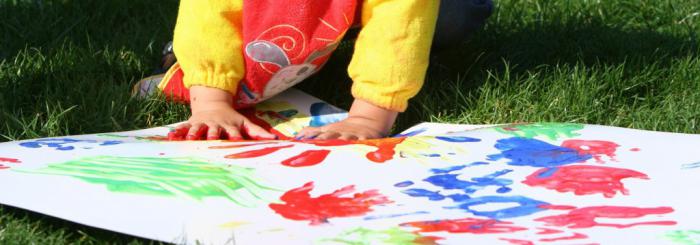
The guys themselves give the image the desired shape. They easily turn him into a dragon, a butterfly, who, on what fantasy enough. In carrying out this task, the children make various movements with their hands: promakivayut, clap, smear.
Figure cloth swab. Master class on the topic
This form of conducting classes in kindergarten attracts children, their parents and educators. With great pleasure, those wishing to attend a master class. Non-traditional drawing techniques are always interesting for their mystery and novelty. If the theme of the master class is to draw a landscape drawing in black and white, then you will need a gouache of the appropriate color, pieces of cotton fabric, a white sheet of paper, PVA glue, colored cardboard, scissors.
So, we start to work. We crush the cloth and make a tampon of it in such a size that it is comfortable to hold it. This will be your brush. Dip it in black paint and draw a horizontal line on a piece of paper. It is the horizon, that is, it separates the sky from the earth. The higher this line, the more space is opened to a look.
Continue drawing nonconventional equipment. We will depict the forest at a remote distance. To do this, with chaotic adjoining movements, we print bushes and trees from the horizon line up. You should always remember that the objects in the foreground are always larger and clearer than in the far. This rule applies to non-traditional drawing techniques. Pictures then turn out beautiful, the objects depicted on them become similar to real ones.
Now fill in the foreground and draw a line of the shore by pulling from left to right. With the same tampon we print bushes, then by means of smearing we draw clouds and clouds in the sky. Next, we depict the ripples on the lake, the sun and its reflection in the clear water. Drawing unconventional technique is complete. The picture is ready.
Children draw everywhere. Parents know: for a child is the best way self-expression, knowledge of the world, manifestations of fantasy. The process of creating a picture gives the young artist not only aesthetic pleasure. It is also tactile sensations, and color perception, and a sense of form, and motor development.
Today, an unusual approach to children's art education is popular: albums and brushes will be useful for school lessons in fine arts, and at home, give your child complete creative freedom. Drawing for children can and should be interesting: let little Picasso master as many different tools and non-standard techniques as possible. The task of parents is to choose the method of painting, taking into account the inclinations and age of the child.
Rare drawing techniques
Finger techniques will be very interesting to the young artist. Show your child that you can paint not only with brushes. At his disposal:
- cotton buds;
- foam sponges;
- toothpicks;
- plastic bags;
- fallen leaves.
Do not limit the imagination of the child. Let him try different ways drawing and choose those that are more to his liking.
How to draw with improvised means
There is nothing difficult in applying paints in a non-standard way. When using unusual instruments, children will have unusual patterns. Having mastered different techniques, a child can combine them in one job: make original background with cellophane, print leaves for trees, blots for clouds, fingers and stamps for flowers.
Adopt the most interesting drawing techniques for children. Try them yourself and teach your young creator.
Blueprint
To discern an artistic image in a usual blob is not an easy task. Every drop of paint is unique: it is impossible to predict what shape and size it will acquire, spreading over a sheet of paper.
You will need:
- paper;
- large hard brush for sprinkling drops;
- gouache or water-diluted paint.
The blueprint technique is as follows:
- Type liquid paint on the brush.
- Shake the brush over a piece of paper - there will be a lot of different-sized droplets on the canvas.
- For large blots, type more paint with a brush and drip. A pipette is suitable for this purpose.
- For more bizarre shapes, moisten the paper with clean water before splashing. The second way - “help” blot spread, blowing on it through a tube.
- Look at the resulting drops. What do you see in them? Starry sky? Small fish and big jellyfish? Berries?
- Modify the blot by adding details with pencils, felt-tip pens.
- Experiment with colored drops, paint consistency, drop height.
Monotype
This is a simple, but very effective drawing technique. Use it to create symmetrical patterns: butterflies, flowers, hearts, etc.
- Take a piece of paper and fold it in half.
- You need to work on one side of the fold: apply paint with half of the element.
- To get a whole picture, press the halves of the sheet together so that the paint is symmetrically imprinted on the second side.
- Finish and decorate the picture.
Paint spraying
In contrast to drawing blots with this technique, the paint is sprayed not on the entire canvas, but on certain parts, highlighted with stencils.
You will need:
- paper;
- brushes;
- paints;
- cardboard sheet;
- scissors.
Cut a stencil out of cardboard and attach to paper. Using a spray of liquid paint, create a pattern on the cardboard contour. If necessary, modify the picture.
In this way, you can make a rather complicated work - everything will depend on your ability to cut. Use the same stencils for drawing foam.
Drawing sponge
Porous sponge is convenient to paint the background and elements such as snow, clouds, fluffy animals.
You will need:
- a piece of foam rubber
- paper,
- paints.
Dip a sponge into the paint and create a drawing with a gentle pressing movement. Bring the picture to completion in the usual way - with a fine brush, felt-tip pens.
Stamps
Children's drawing stamps can be bought in the store: figures of animals, flowers, cartoon characters - with the help of ready-made signets you can paint almost any object.
But it is more interesting to make stamps with your own hands.
You will need: slices of potatoes or carrots.
Draw the desired element, cut off the excess with a knife - you will have a seal for stamping with paint. Dip and make prints on paper.
Cellophane paintings
The essence of this interesting drawing technique for children in creating patterns using plastic bags. Quickly apply a watercolor brush and until it is dry, apply cellophane on top.
Moisten your fingers and begin to "wrinkle" the package in different directions - paint will collect in the voids formed. After drying, remove the stuck bag from the paper and admire the fancy patterns. This technique is suitable for making the background, coloring paper for postcards, applications, crafts.
Autumn drawings
Use this drawing method in the fall. Collect the fallen leaves - they will serve as stencils for children's drawings.
Apply paint to the embossed side of the paper and attach it to the paper. You will print outlines and streaks of leaflets. The child decides what to make of these “blanks” himself - just like blots, the leaf drawing technique perfectly develops the imagination.
Do not be afraid to experiment! Give your child new ideas, how interesting it is to draw, and who knows if you have a real artist?