Applique on summer in younger group kindergarten This is an artistic activity that enriches the experience of the child in knowing the world, objects and their properties. Sticking small pieces of paper develops motility and tactile sensations, which in turn affects overall mental development.
In the process of classes the role of the teacher in the younger group of kindergarten or parent - guide the actions of the child. It is necessary to show the child how to do it, but not to perform it for him and in no way suppress his own fantasy.
To make the classes more interesting and joyful, work with materials can be combined with writing a story or learning a suitable rhyme.
About the sun:
- I get up with the sun
- Next to the birds I sing:
- - Good morning! On a clear day!
- - That's how joyfully we sing!
About the cloud:
- Cloud with the sun again again
- Hide and seek began to play.
- As soon as the sun is gone,
- The cloud suddenly gets upset.
- Well, as the sun there,
- Immediately the rainbow laughs.
Application on the theme of summer in the younger group of kindergarten. Stepwise execution
 For this we need to purchase the following materials:
- White, yellow, red, green and blue paper
- White cardboard
- Glue (PVA or pencil)
- Scissors
- Black and green markers
At the first stage it is necessary to prepare some elements of the application. In the picture we will have grass, flower, clouds and a ladybug. With the help of such an application, you can discuss the simplest signs of summer with your child, as well as disassemble the primary colors. We advise you to make figures of such size that it would be comfortable for the child to hold and glue.
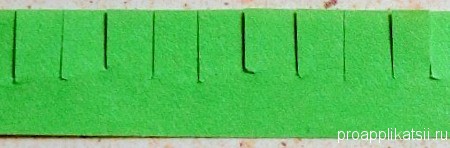 Let's start with green paper, we will cut out a strip 2-3 cm wide from it. It will be grass. For greater realism and volume, you can cut it with one hand - as if the fringe will work. This task can be entrusted to the child himself, if he is already pretty confident. It is better to choose children's scissors, more convenient for kids.
 Now let's cut out 3 blue clouds. You can make them in the form of ovals, but you can leave uneven edges.
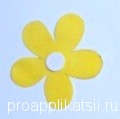 Make a flower with a few petals of yellow paper, and make a round core of white. If the child is small and the score is not yet available to him, then the number of petals is not so important. But for older children, make the appropriate accents, ask to count the details of some object on the application.
Last: cut out 2 red circles (or scooped) and bend each one in half. These are parts of a ladybug. On the outside you can draw a few black dots that are always present on the back of the insect. Pay attention to this fact child.
Begin to stick. First the grass and the flower, then the clouds and at the end - we collect ladybug. The parts of the insect are touching only on one side, the opening of its wings in flight is simulated. Glue is applied to the inner, non-colored, part of the paper. You can also apply a sticky substance on the cardboard itself, and then apply the application detail and press it firmly with the palm (or handkerchief).
For older children, the task can be left approximately the same, but with complication and additional details, large and small. Do not be afraid to combine paper, paint, and clay.
Choose for classes with children rich colors that are clear and familiar to them. To make the child clearer, buy colored paper on the one hand white and paint this particular non-colored part.
If the children are small, then use only the primary colors (red, yellow, blue, green), in the amount of 2-3. When these colors are mastered, you can proceed to the study of shades and color mixing.
What can be children's summer applications?
Applications on the summer can come up with a huge amount. Here is a large field of options. It can be the simplest pictures, designed for no more than 10 minutes. For example, only insect and flower or insect, grass and sun.

And beautiful basket full of flowers.
It is desirable to make it out of durable cardboard, so that the child has the opportunity to play with it in consequence - to defy the handle. 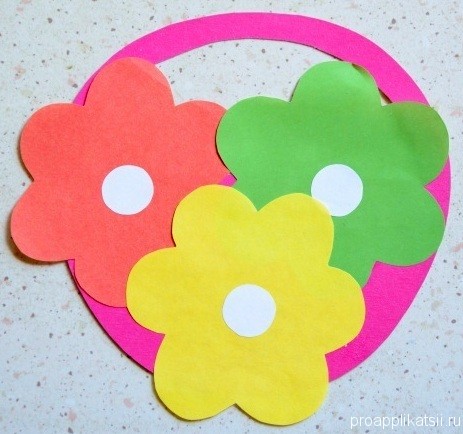
Summer is the time of mushrooms and berries.In creative activities with a child, it is also necessary to pronounce: print a hedgehog
and on his back glue mushrooms and berries. In the figure of the mushroom, the main thing is a stick-shaped foot and a cap, that is, a semicircle. Berries can be shaped, for which they can be downloaded from the Internet and printed, or simply in the form of colored circles: currants, gooseberries, etc. 
The materials of summer applications are limited only by your imagination. In addition to cardboard and colored paper, popular options are cotton pads (or just pieces of cotton), from which you can make a flower, for example, a chamomile, and an animal or an insect. Good wool is also suitable for clouds
. Draw a rainbow with your child and then clouds and make them fluffy! 
From the napkins easily get rain.
In this case, you can take as a color napkin, and just white, and then paint the paint. Only need to wait to glue a little dry. 
You can also use loose elements, for example, cereals . Just be careful: you need to monitor the child when working with them so that he does not eat them. 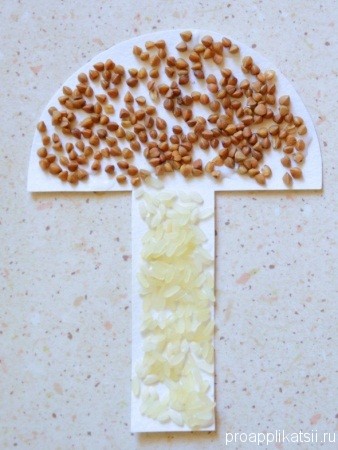 inadvertently and, if possible, did not particularly scatter. An example would be a large mushroom made in this technique. Dark hat it can make them buckwheat, and for the legs to take rice. At the request of the child can immediately smear the application with glue
and then to sprinklerelevant cereals , but it can be done in stages: some of them were smeared, several grains were put in, another part was smeared again, etc.
inadvertently and, if possible, did not particularly scatter. An example would be a large mushroom made in this technique. Dark hat it can make them buckwheat, and for the legs to take rice. At the request of the child can immediately smear the application with glue
and then to sprinklerelevant cereals , but it can be done in stages: some of them were smeared, several grains were put in, another part was smeared again, etc.
It may seem more difficult and the child will deal with it for a long time, but for a change take a fabric or yarn. It can be cut into small pieces and also make an application. If you are not interested, you can use buttons. They make wonderful flowers or eyes of animals, as well as paths and everything else you can think of.
Blanks for children's applications
Since parents or caregivers do not have too much time for daily activities with the child, but at least a little artistic activity need to be carried out regularly, it may be recommended to prepare for joint work in advance. That is, you can make several samples of the most common objects for applications.
So, for the summer will be relevant different size butterflies.
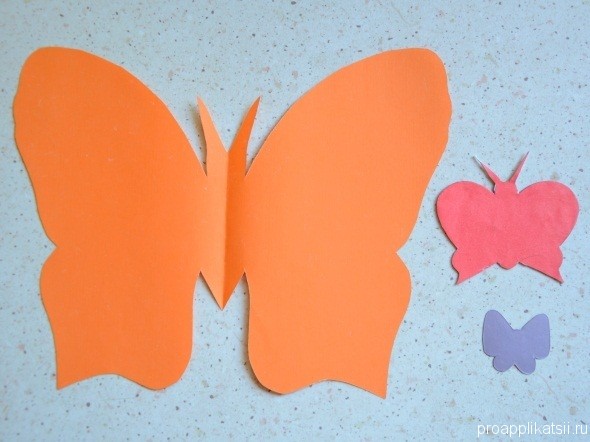
Every mother wants her child to fully develop, learn about the world and learn new things. Creativity helps the child to express feelings, emotions, and develop fantasy. Applications on the theme of summer from colored paper for children of 3-4 years should not be complicated compositionally, but they must be bright and fascinating, so that the child would like to return to this activity.
Flat application
It is easiest for a child to cope with a flat appliqué. You can draw the details. Trust the kid to cut them. If he does it for the first time, give him some simple parts, where there are simple lines without complicated turns. When the parts are ready, have your child place them on a piece of cardboard. 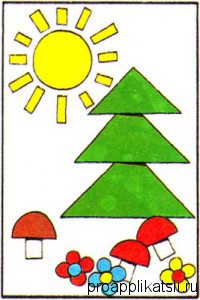 or paper. Then the child should smear the parts one at a time with glue and glue to the allotted place.
If you want to make applications about summer, then it can be flowers, a house in the village of a grandmother, fruits and berries, the sun, trees, butterflies and much more.
Let the child show his imagination and decide for himself what should be depicted.
For starters, you can try to make a cute butterfly or flower, consisting of a small amount of simple details.
But if you see that a child copes with such a task very easily, complicate it. For example, you can make a postcard for dad or grandmother. This composition is made up of the sun, mushrooms under the Christmas tree. Trust the child to arrange the paper parts on the sheet independently, and then glue them.
Volume application
 Undoubtedly volume application About the summer will be more difficult, but if the child likes it, the process can turn into a fascinating activity.
Volumetric application can be done in several ways. It can be folded or folded pieces of paper, and torn small crumpled pieces of paper.
It will be quite easy to make such a bright flower here, but in the cold season it will also remind of hot summer and bright colors. You draw the petals of the flower, as well as the leaves, the stem and the middle of the flower. Then, along with the baby, cut out all the details. Each petal must be bent in half. You also need to do with leaves.
Glue the petals so that each subsequent found on the previous one. Glue only one half of the petal with glue. Then stick the rest of the parts. It should be noted that the leaves do not stick completely.
Such an application is easy to turn into a postcard. It is enough to make the inscription "With the holiday!", "Since March 8", "Beloved mother" and so on.
Breakaway appliqué
To create clipping applications for summer, you need to pick or cut a lot of small pieces of paper. Choose a template that would interest the baby.
Like no other application, the breakaway perfectly develops fine motor skills, as well as perseverance and patience.
You can start classes with a simple discontinuous application. For example, from such a kitten.
Give full imagination to the child. May need your help in the preparation of the composition in the first times, and then the kid himself can do it.
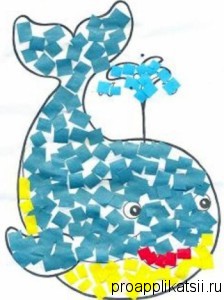
 If your baby remembers summer together with ripe watermelons, then you can create an application about a piece of this sweet and juicy berries.
A child can cut out squares or triangles (in general, how it will turn out) of which the application consists. To make it easier to stick the application, on a piece of paper you need to draw a picture or copy a template. So the baby will be on what to navigate. With the gluing, he can cope if you tell him where to put what figures.
Applications made from colored paper on the topic summer for children of 3-4 years old will not only take an active part in the development of the child, but also preserve memories of flowers, a warm sun, a trip to my grandmother and many other things.
Master Class. Handicraft paper with children 5-7 years.
"Bright Summer" application workshop with step by step photos for children 5-7 years.
Karpova Veronika, 6 years old, preparatory group of MBDOU No. 202 “ Kindergarten general developmental form "Fairy Tale"
Head: Kokorina Tatyana Nikolaevna, MBDOU No. 202 "Kindergarten of general developmental form" Fairy Tale ", Kemerovo
Purpose: production of half-volume composition of colored paper on the summer theme
Tasks:
- continue to learn how to work with scissors;
- continue to learn to cut symmetrical shapes;
- continue to learn how to work with templates;
- continue to learn to work carefully with glue;
- to promote the development of fine motor skills of hands, through cutting out small parts for application;
- to raise interest in the application, to cause a desire to perform crafts from paper.
Description: This master class will be of interest to teachers of senior and preparatory groups, to all those who like to create something new from paper, for children in grades 1-2, mothers of many children and creative people.
Purpose: This crafts can be an interior decoration, can be donated to a loved one for a birthday or become a participant in the competition.
Required tools and materials:
- colored and tinted paper;
- white cardboard;
- cardboard disposable plate;
- a simple pencil;
- ruler;
- scissors;
- glue;
- black felt pen.
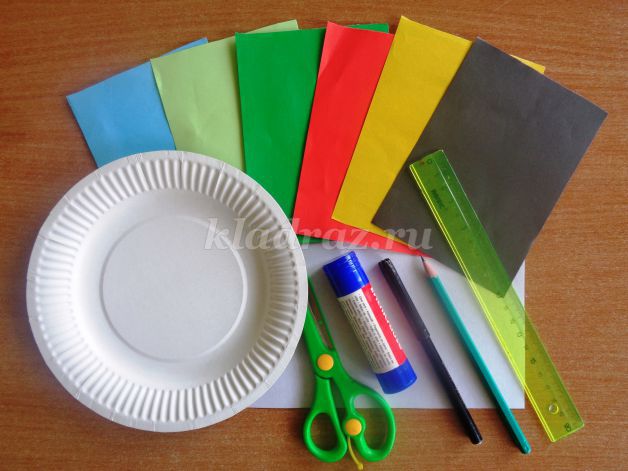
- Patterns: circles d - 13 and 4 cm, half-leaf - 8 cm in height;

Working process.
Summer, summer, you are beautiful:
Everything is blooming, and the sky is clear ...
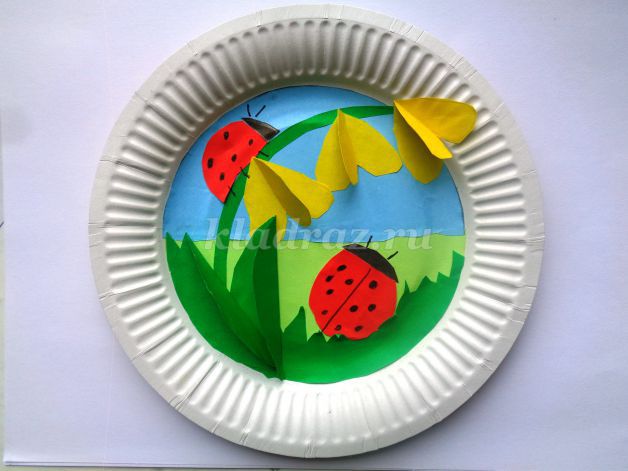
Summer is a wonderful time. Flowers, berries, butterflies, ladybugs, green trees, warm water in the river, bright hot sun - everyone who hears about summer will remember all this. And summer crafts are distinguished by their brightness, color saturation, as if they are filled with sun and scent.
So we could not resist and decided to make a summer crafts.
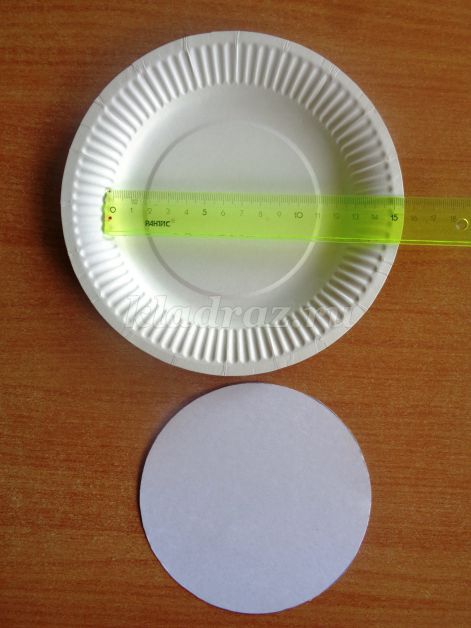
Cooking background.
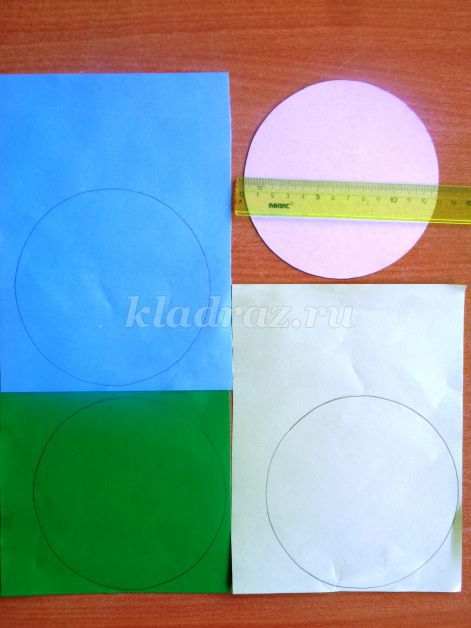
1. Using the 13 cm circle template (which corresponds to the diameter of the inner circle of the plate), on the paper of blue, light green and bright green colors we circle the circle and cut it out.
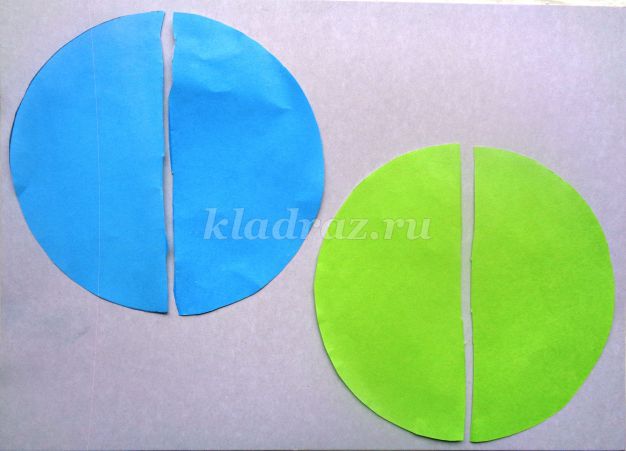
2. Fold the blue and light green circles in half.

3. Unfold and cut along the fold line formed.
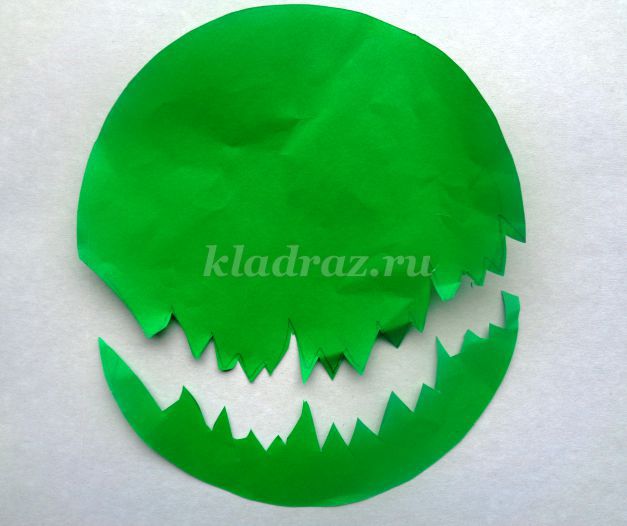
4. On a bright green circle draw grass.

5. We cut.
Cooking elements for flowers and ladybugs.
Summer - bright flowers
Unusual beauty!
Each flower is two hearts glued together. Cut hearts and leaves will be in the technique of symmetric cutting. To make them do the following:
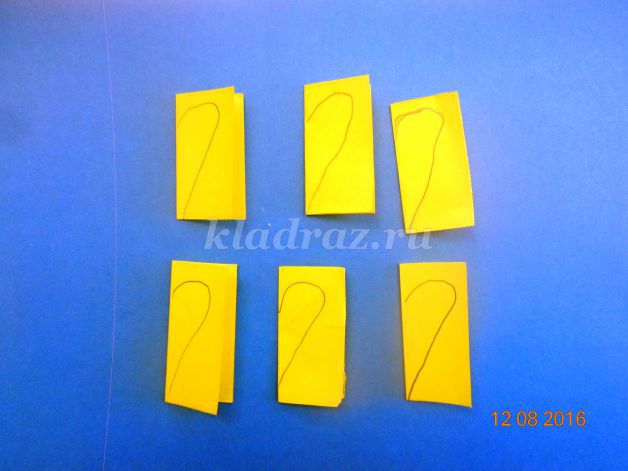
6. Cut six yellow squares of 4x4 cm.

7. Fold in half and draw on them halves of hearts, observing the fold line.
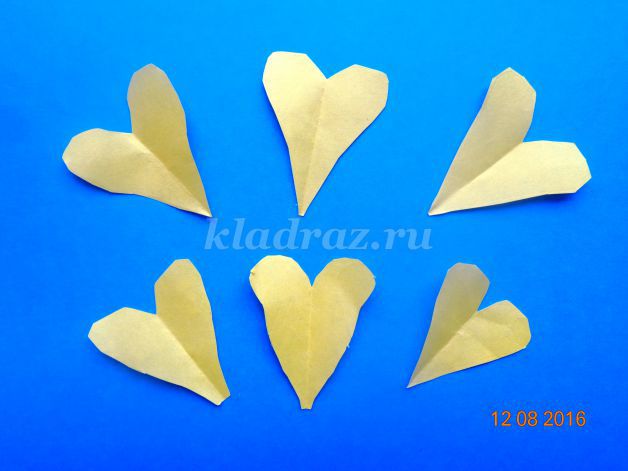
8. Cut, unfold and get hearts.
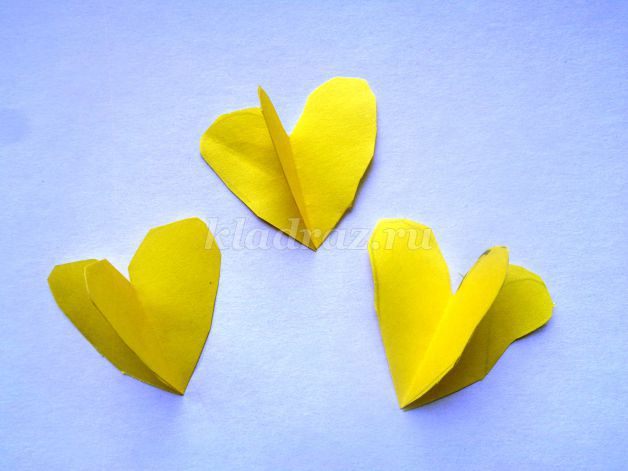
9. We glue two hearts together for one half so that we get volumetric flowers.
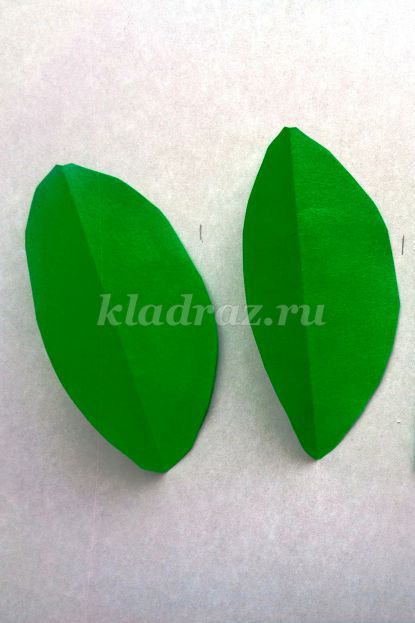
Getting down to cutting the leaves.
10. Cut out two green rectangles 5x8 cm for leaves.

11. Fold the rectangles in half lengthwise. Using the half-leaf pattern we draw half a leaf on each folded rectangle.

12. Cut, unfold and get leaves for the flower.
We turn to the manufacture of ladybirds.
Ladybug climbs
On the blade of grass is very clever.
Wings like petals
And dots turn black on them.
The back from a distance is visible -
Bright red she is!
I. Wolf
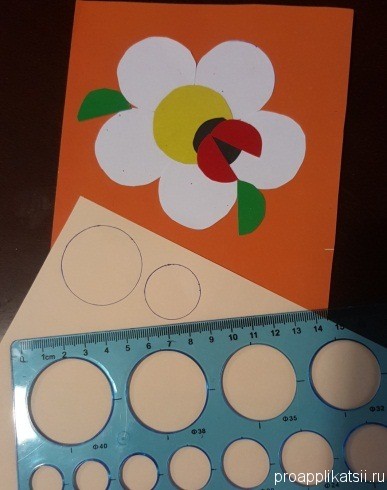
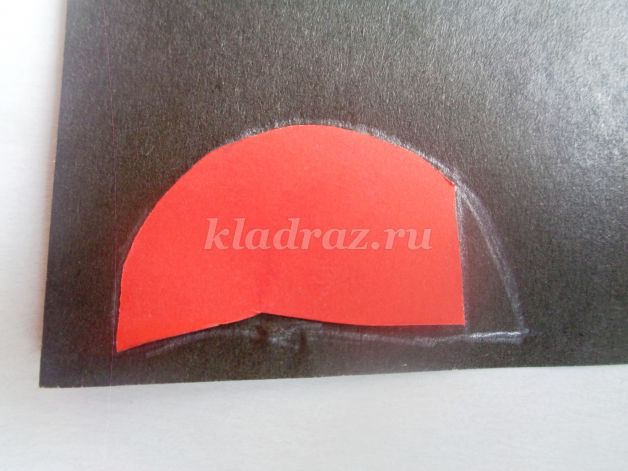
13. Using the template - circle d 4 cm. - on red paper we circle and cut out two circles.
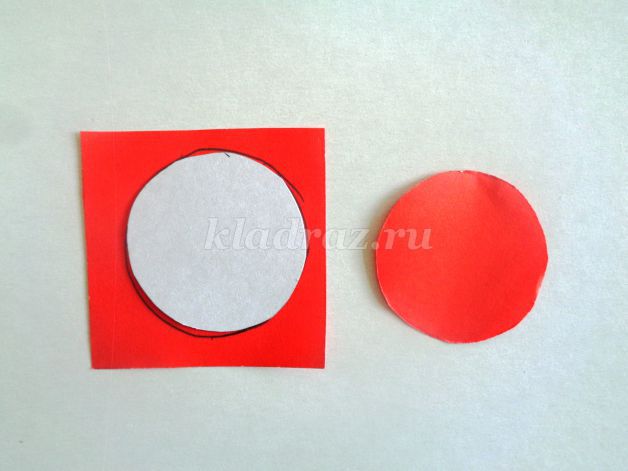
14. On the first circle, departing about 0.5 mm from the edge, draw a pencil line and cut the resulting semicircle along it.
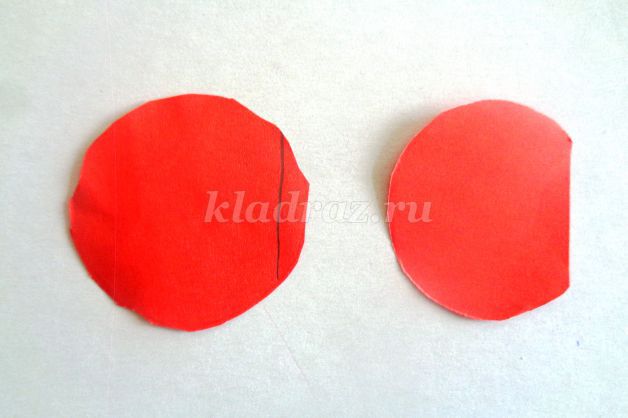
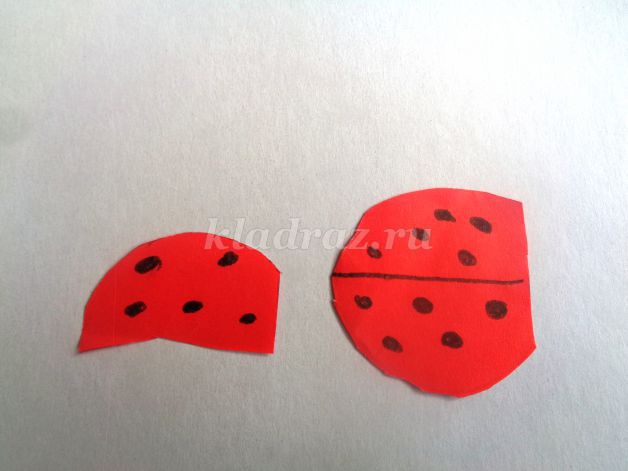
15. We fold the second circle in half, unfold it and cut it in half along the resulting fold line. The result was the torso of the ladybirds.

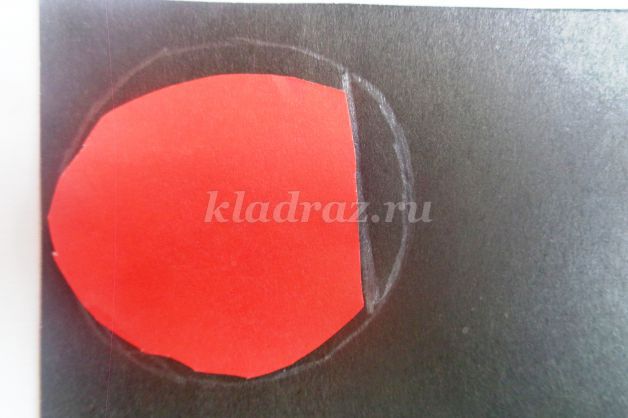
16. Put the red circle and semicircle on the black paper and paint on the head with a simple pencil.
17. Black felt-tip pen draw spots on the body of ladybirds.
Our blanks are ready.
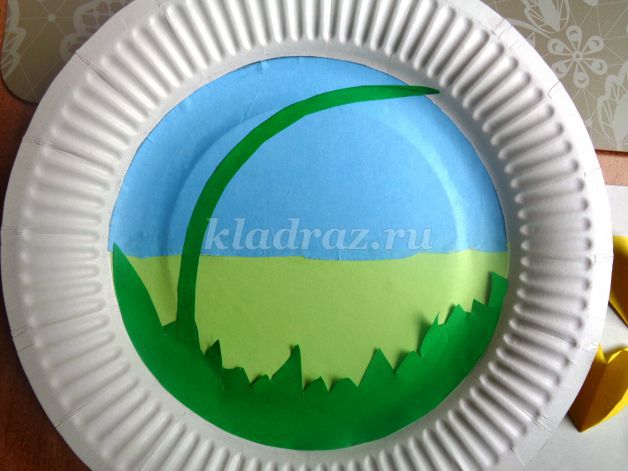
18. We glue the background: a light green semicircle, a blue semicircle, bright green grass and a flower stalk from above.
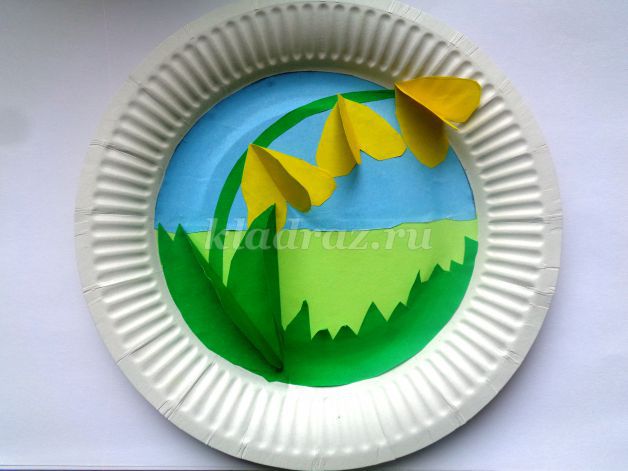
19. Glue the yellow flowers. One slightly on the edge of the small plate.

20. Glue the green leaves on one flank, create a half volume.
21. Glue the ladybird down on the grass, paint on the antennae.

22. Glue the second ladybird to the flower stalk, draw the antennae and legs with a felt-tip pen.

23. Crafts are ready.
I wish you more creative ideas for creating crafts!
I hope my idea is useful to someone.
I would appreciate comments.
Thank you for attention!